7. Administration of BSCW Servers
There are three methods to administer the BSCW server:
- through a HTML interface available to those users who have been
registered as server administrators in the variable
SERVER_ADMINS of the BSCW server instance
configuration file
<bscw-runtime-path>/conf/config.py(see section 5.2 conf/config.py), - by direct editing the configuration files described in section with a text editor of your choice,
- through the bsadmin scripts which are available in the instance directory of the BSCW server (the bsadmin script may only be invoked by the user who installed the BSCW instance, e.g. the BSCW administrator user ID).
It may depend on the particular task which methods can or has to be
used. For instance, the initial set-up of the BSCW server requires
editing the BSCW instance configuration file
<bscw-runtime-path>/conf/config.py with a text editor. If the
server is running, further modifications of the configuration file may
either be done by direct editing or through the HTML interface.
Administration tasks such as removing or adding users require a running
server and can only be done through the HTML interface or with the
bsadmin scripts. Starting or stopping the server can only be
done with the bsadmin script.
In general, it is recommended to use the HTML interface after the BSCW server has been installed successfully and started with the bsadmin script since it provides all the functionality which is needed for a system administrator.
Please note that a server administrator needs to understand what s/he is doing. Any actions carried out by the server administrator may destroy data or may even damage the BSCW server instance.
As a server administrator you are also responsible for other measures against loss of data. Please remind to set up the BSCW daily garbage collection. It is urgently recommended to install a regular back-up procedure for the data of the BSCW server, e.g., to recover in case of hardware or software crashes. In particular, it is highly recommended to make a back-up of the system, including the configuration files, if you want to make modifications to the system through the administrator tools described in the following sections.
7.1. Administration using the Web Interface
A running server can be administered using the web interface. (Note most
administration tasks do not need to shut down the server; some even
require a running server.) If you are registered as a BSCW administrator
in the variable SERVER_ADMINS of the BSCW
instance configuration file <bscw-runtime-path>/conf/config.py,
you will find the action in the
menu.
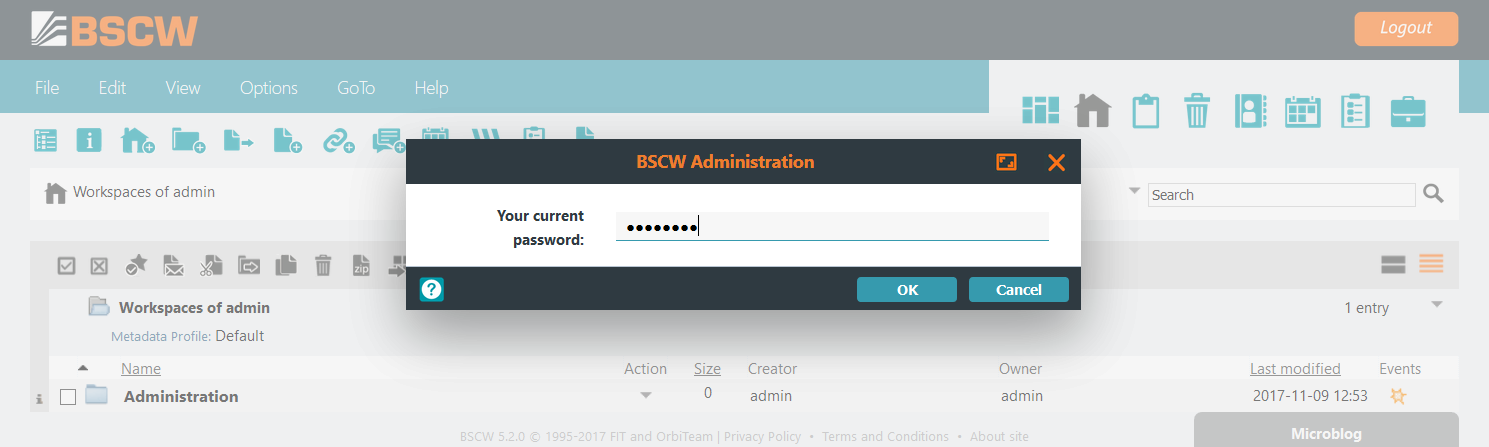
Administrator users explicitly need to log in a second time with their
password at to gain BSCW
administrator rights. Without this additional administrator
authentication no administrative rights are applied to their account.
After successful login an additional menu is
available at and the administrator
status is indicated by a Admin label at top of the BSCW user
interface.
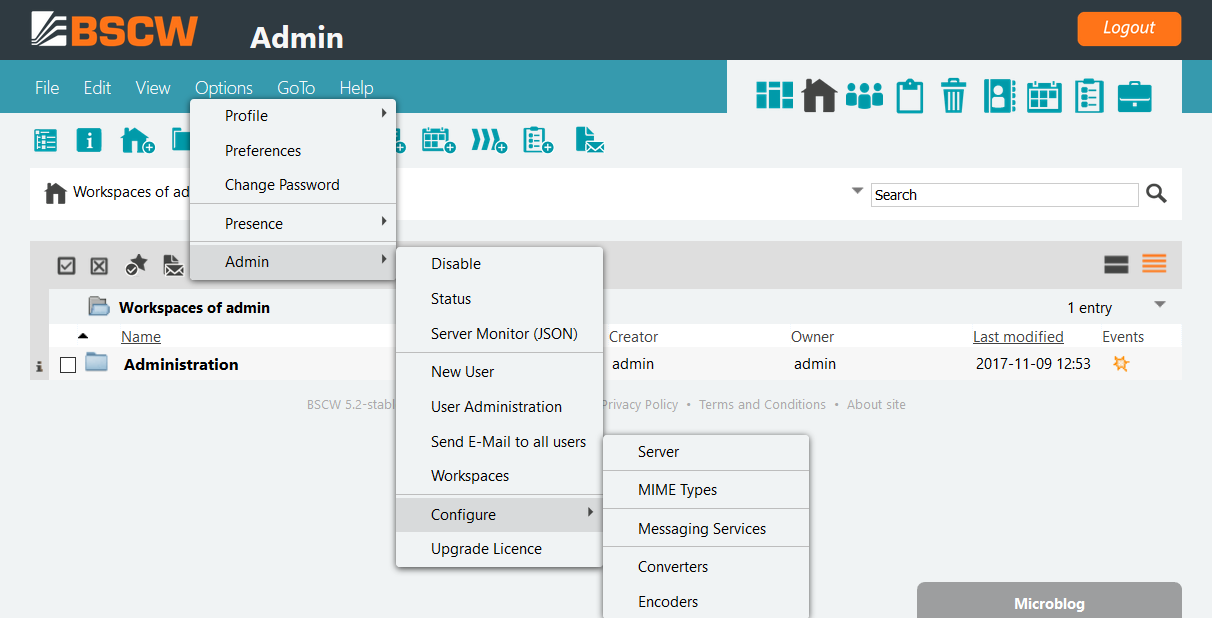
Using the administrative menu allows to perform different administrative tasks. The menu contains the following entries
- the entry disables the administrative rights of the current user again,
- the entry displays the BSCW status page,
- the entry creates an access token to get statistics data for monitoring in JSON format,
- the and the entries provide BSCW user access management functionality to search, modify, create or delete new users,
- the entry allows to send administrative email to all users,
- the entry displays a table of all existing shared workspaces,
- the menu entry allows BSCW server configuration via the web interface,
- the entry summarizes the BSCW licence management and provides functionality to apply for a new licence by contacting the OrbiTeam licence service.
7.1.1. BSCW status page
The BSCW status pages provides an overview about the BSCW management functions and lets you perform all major administrative tasks.
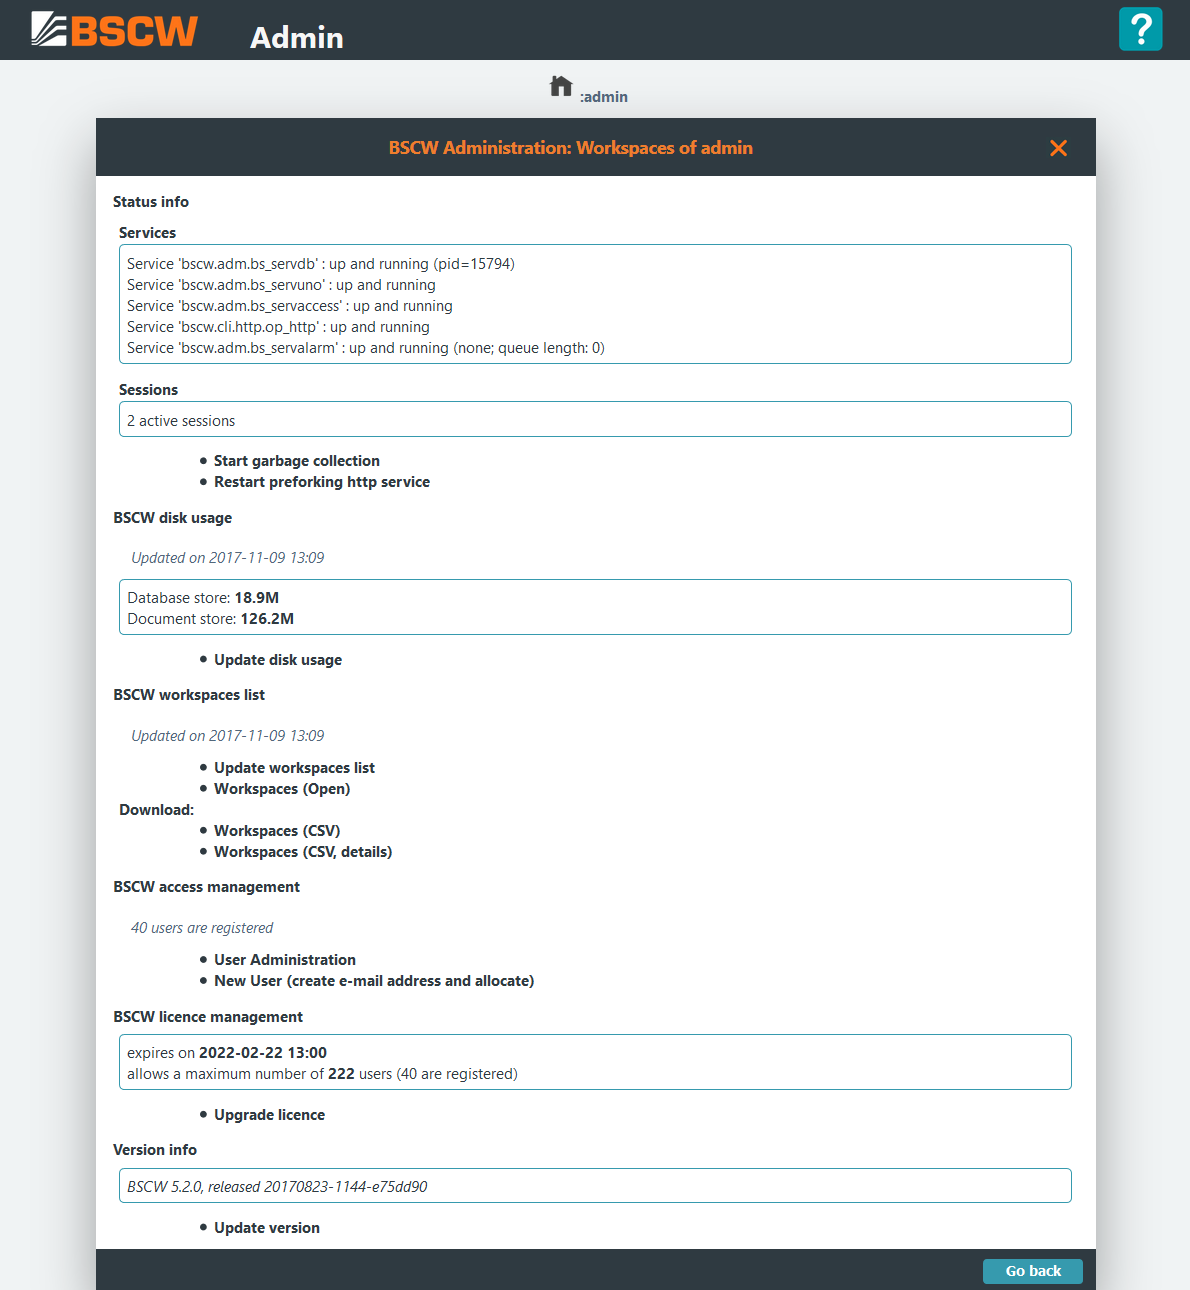
The Services section shows all running BSCW services: the database server (bs_servdb), the user notification service (bs_servuno), the access service (bs_servaccess), (if configured) the pre-forked BSCW HTTP server (op_http) and the alarm service (bs_servalarm). The alarm service additionally displays the actual queue length of pending alarms or jobs which are scheduled for execution.
Note
- If the alarm service (bs_servaccess) in the service section
shows the status not running there is a problem with the web
server
localhostconfiguration. Please refer to the system log file<runtime>/var/log/sys.logto get a a more detailed error description and fix the webserver configuration, see Apache HTTP Server Configuration for details. - The queue length may increase quickly due to schedules preview calculation jobs which will be executed sequentially one by one.
If you click on the garbage collector is started, which will become necessary if you have downloaded a new licence and want to install it.
The option is only
available if the pre-forking BSCW HTTP server is enabled (see
http). Using the BSCW HTTP server requires a restart after each
configuration change.
The calculates the used disk resources of the BSCW database server.
allows to update an overview of all existing workspaces. You can immediately browse this workspace list by clicking on or download it as comma separated list file by choosing resp. .
or allows to search, modify, create or delete user accounts.
Using form allows to perform licence upgrades.
Finally will open a link to the BSCW download web site.
7.1.2. BSCW Access Management
The and the menu entries provide BSCW user access management functionality to search, modify, create or delete users. Clicking on shows the following form to search for registered users of the system:
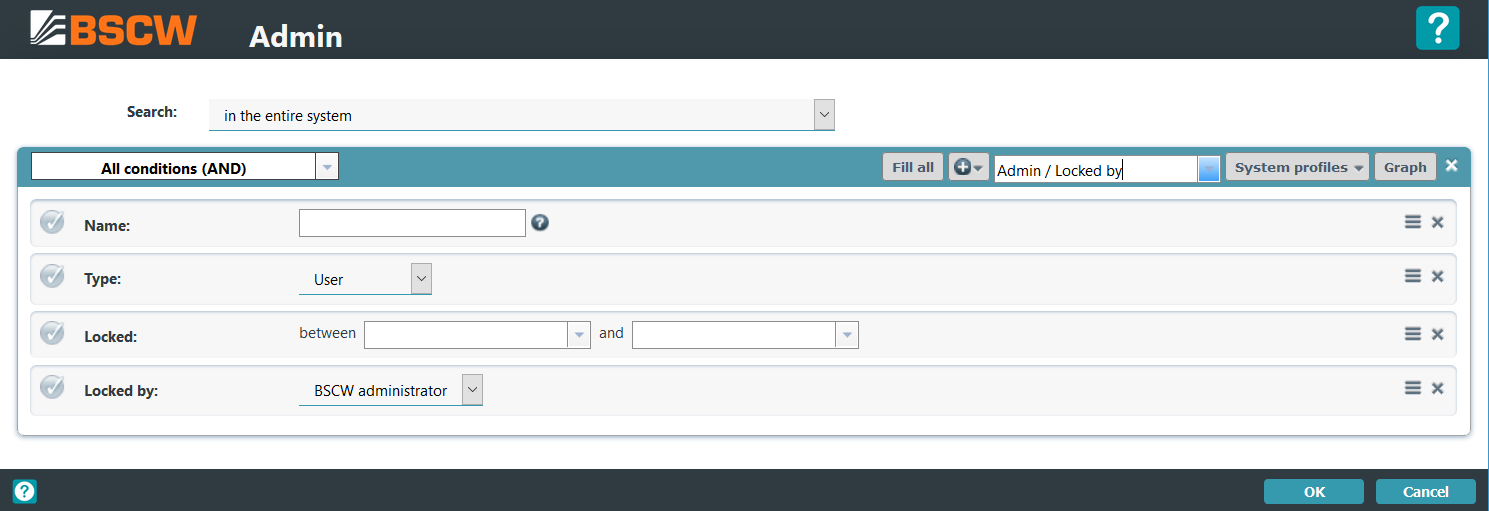
After specifying a query and submitting it, the system will present a list of one or more users (in case the query matched registered users). Note the search can be restricted to particular attributes, e.g. as shown above to user name, last login before or locked since dates. The result of a query may look as follows:
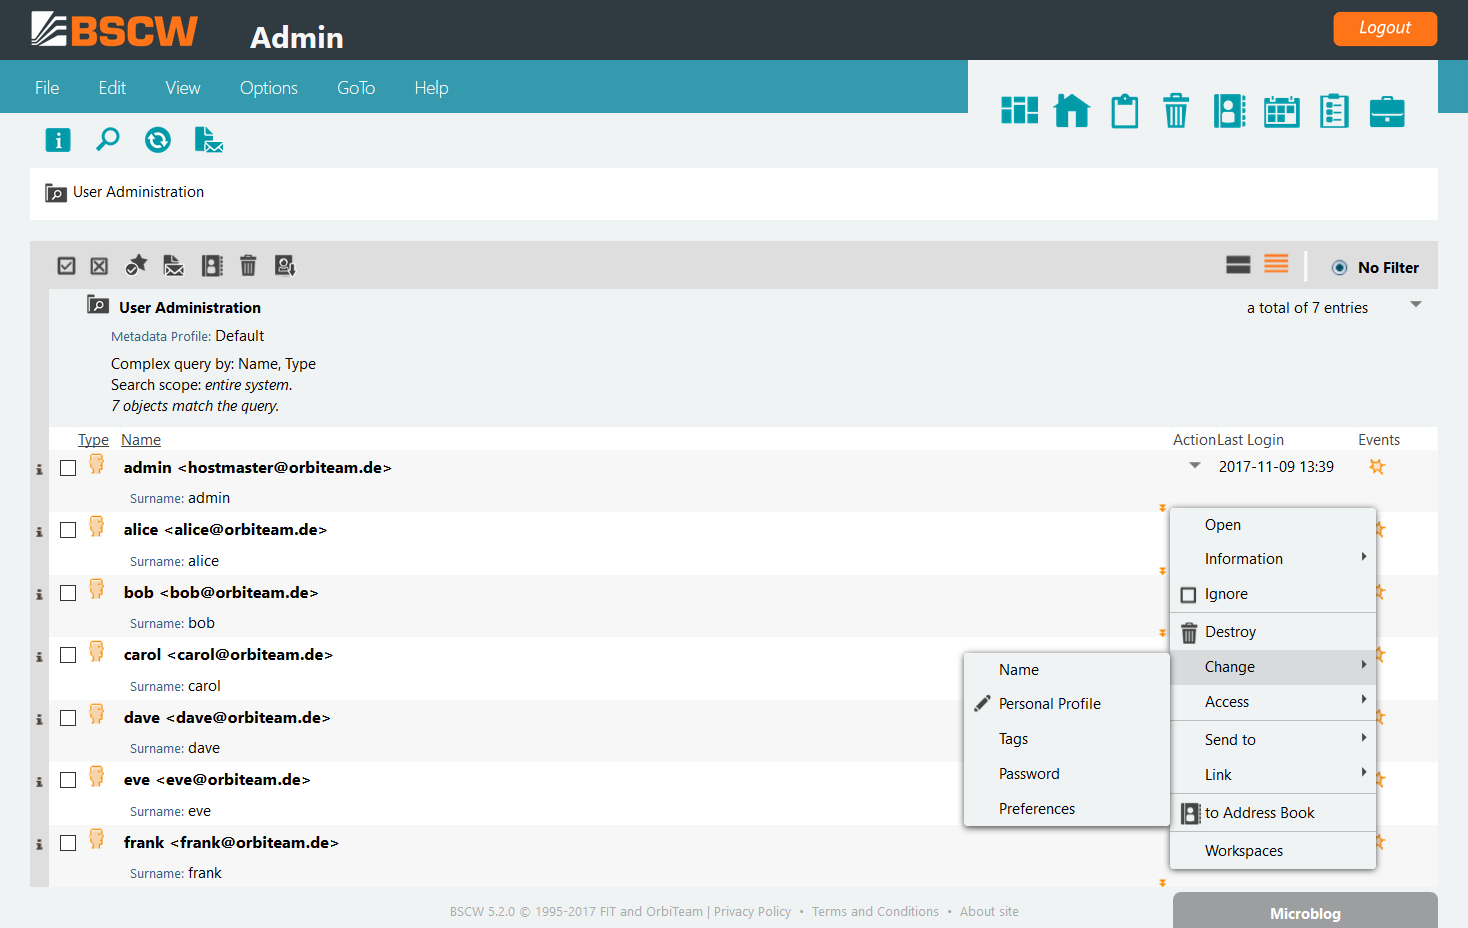
Using the action menu provided on each result entry, the BSCW administrator may remove users from the system, rename users, edit user properties such as language preferences, change the users’ password or access rights.
The creation of a new user is performed in two steps. In a first step the BSCW administrator creates a new email address which is afterward allocated to a (new) user.
See also
Section 7.3 User administration.
Clicking on shows the following form, which is used to add a new email address to the system
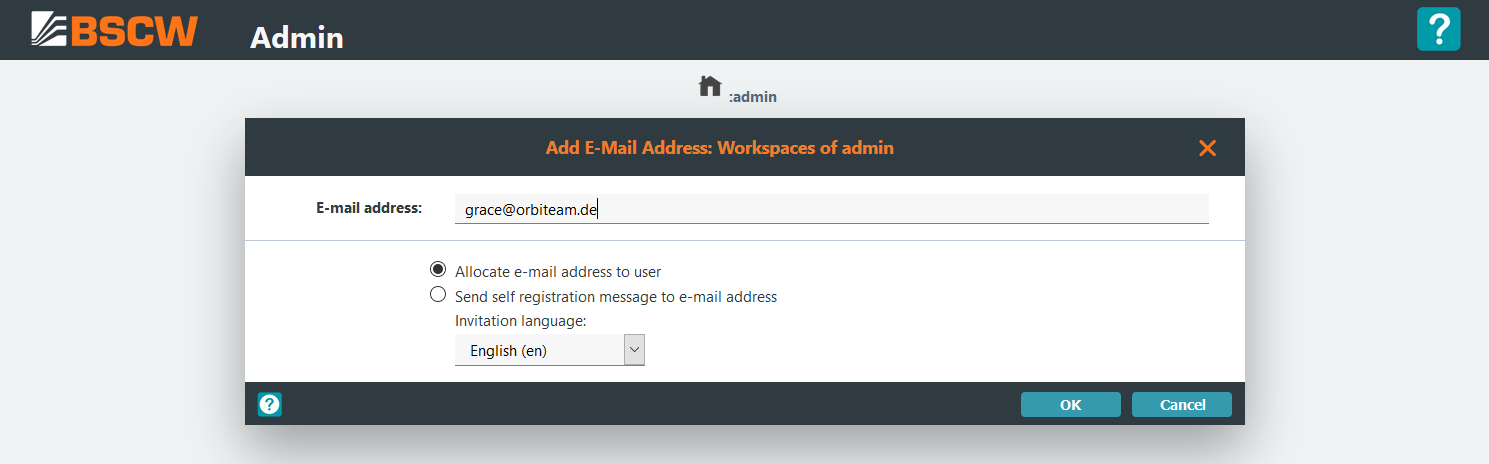
After entering an email address and clicking on
the new email address must be allocated to a (new) user. When selecting
the option [x] Send self registration message to e-mail address a
self-registration notification is sent to email address.
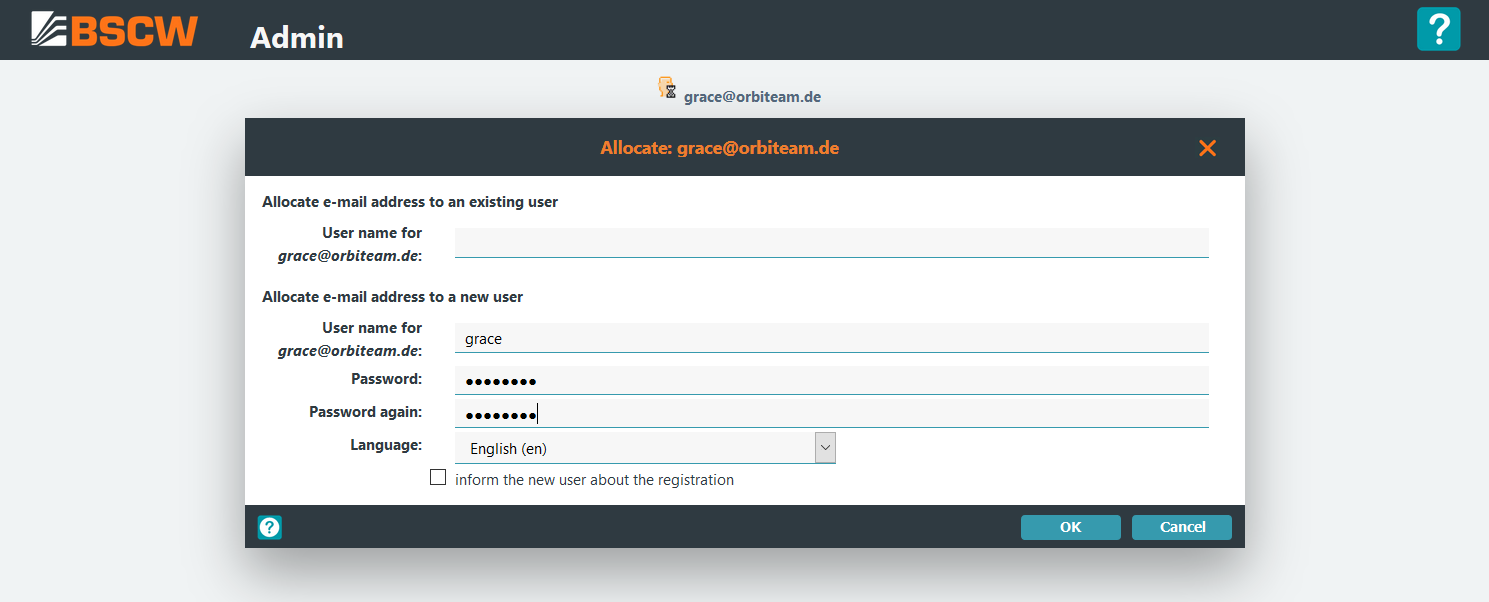
Alternatively when selecting the default option [x] Allocate e-mail
address to user an user is allocated to the new email address within
the next form:
Finally the info page of the entered user is shown:
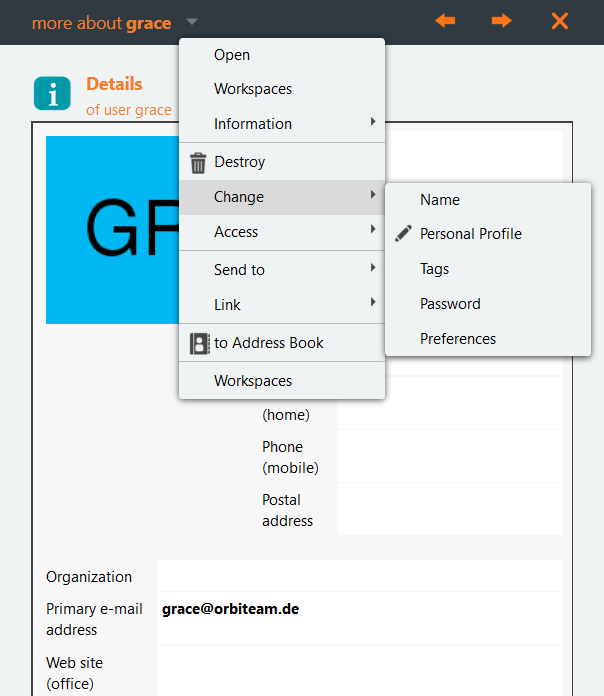
The administrator may repeat the allocation of the email address to another registered user, or set the email address to “bounced” status (see section 7.3 User administration).
7.1.4. BSCW licence management
The BSCW licence management allows to apply for a licence resp. to prolong an expired licence and to install a granted licence To apply for a licence open the Upgrade Licence form by clicking the button:
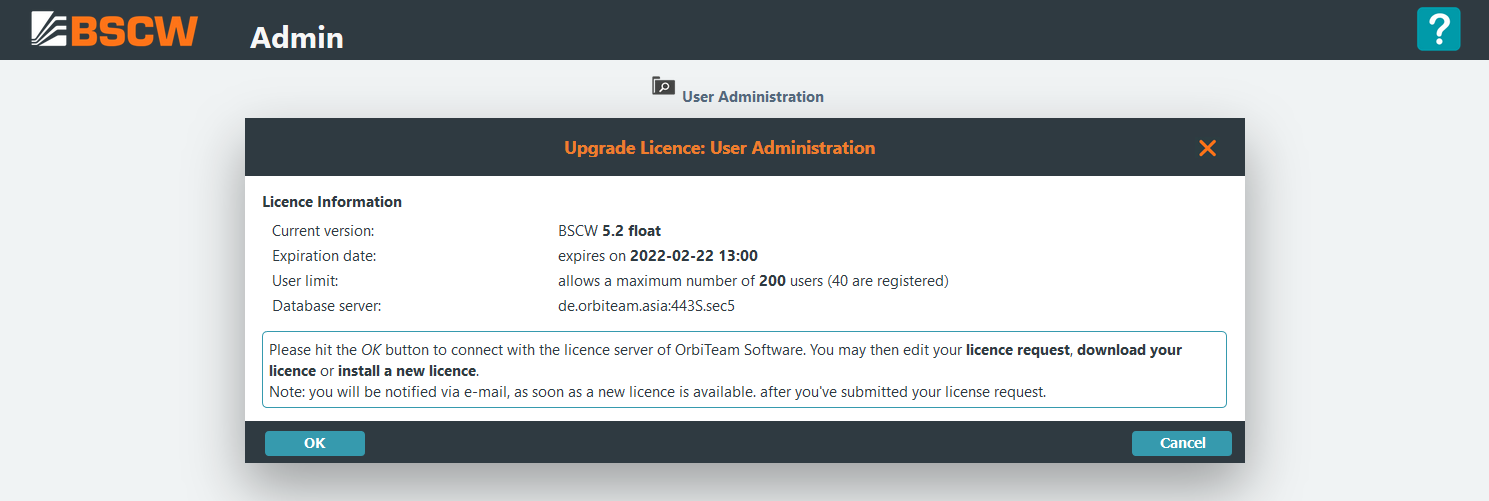
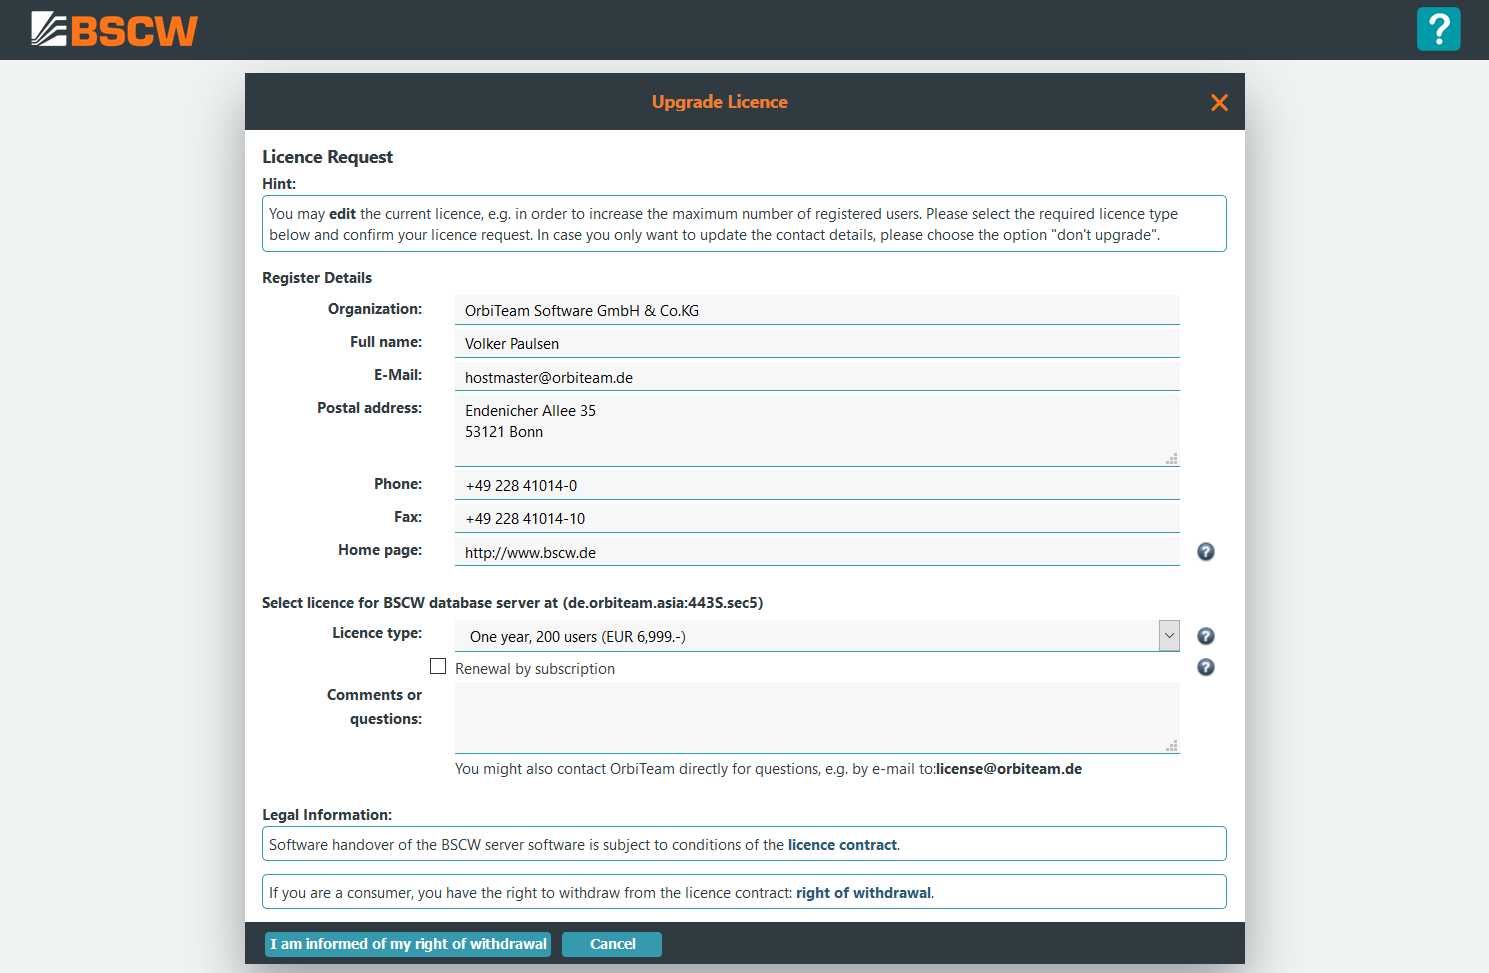
Next press which allows to edit a licence request, to download or to install a licence:
When applying for a licence please fill in the licence request form and press to submit the licence request to OrbiTeam. Further details about the licence acquisition process are given in chapter 9 BSCW license.
When downloading a granted licence you have to accept the licence agreement
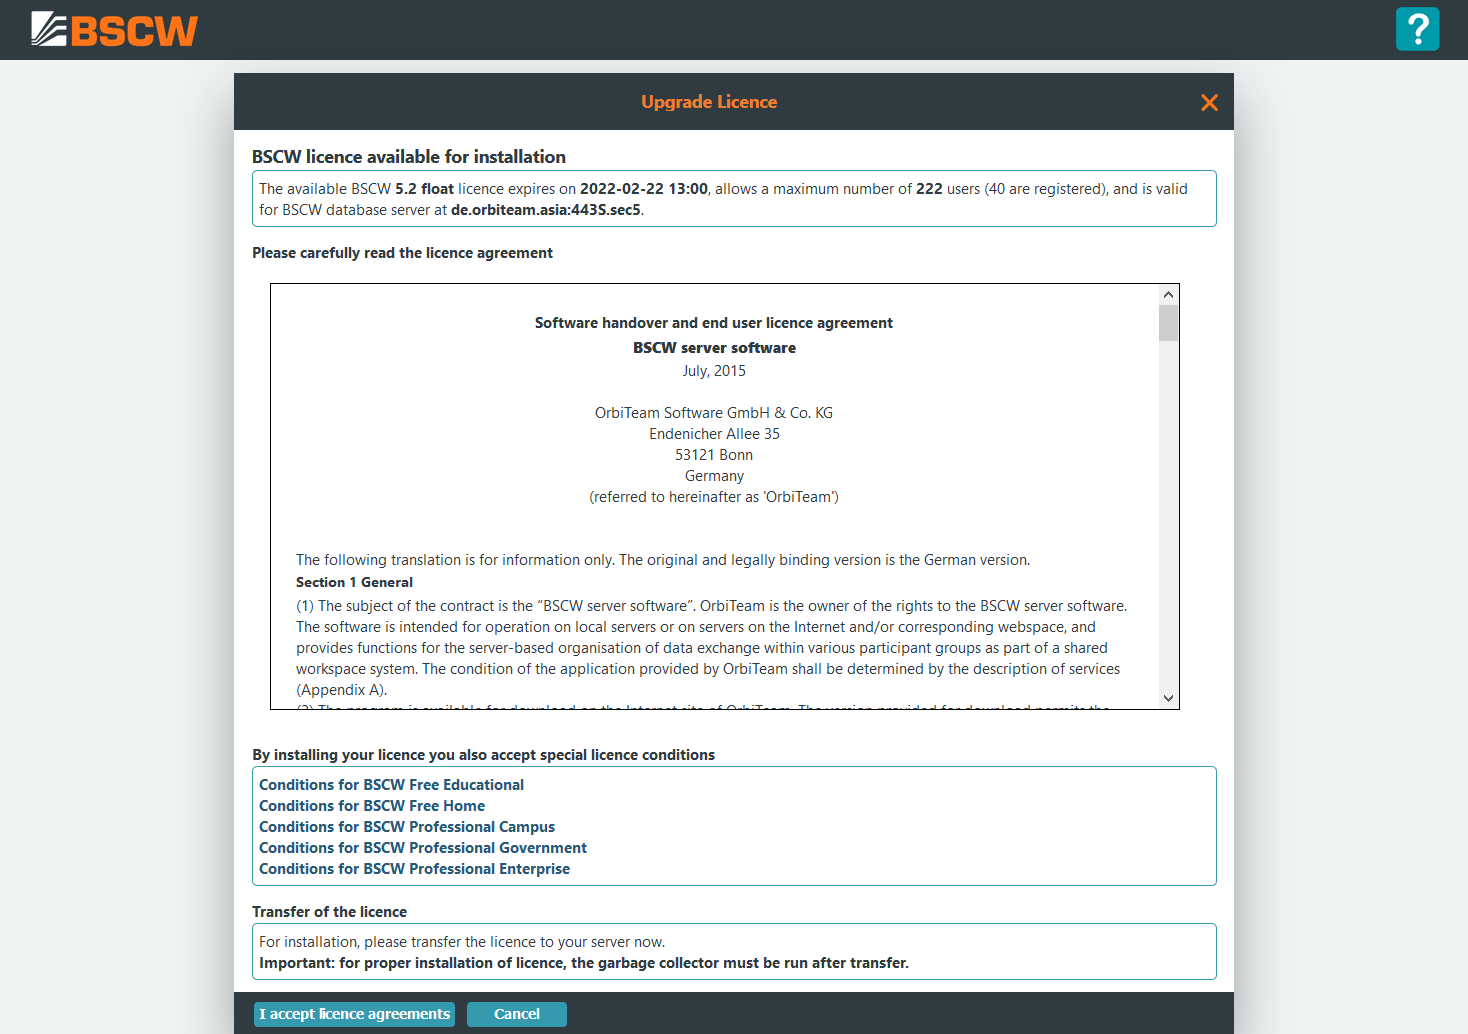
and run a garbage collection by pressing
[Start garbage
collection]
on the BSCW status page: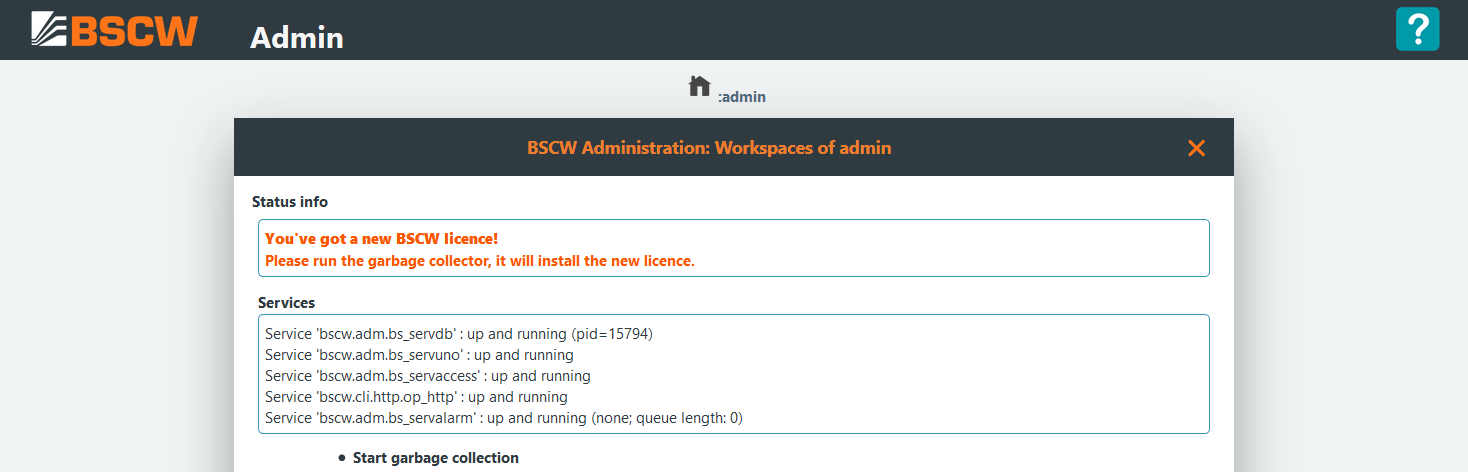
7.2. Administration using the bsadmin script
The bsadmin script constitutes the central access point to the BSCW instance from the command line. Starting with BSCW 5 it is located in the bin directory of each BSCW instance: <bscw-runtime-path>/bin/bsadmin.
The primary purpose of the bsadmin script is starting and stopping the BSCW server, starting the garbage collector and executing the workspace report function. The garbage collector is normally triggered on a regular basis, e.g., by a cron job on Unix systems or by the task scheduler on Windows 11, Server 2019/2022/2025 systems. Therefore the normal usage of the bsadmin script is only as:
bin/bsadmin start
bin/bsadmin stop
bin/bsadmin garbage
In addition, the script can be used for a number of administration functions.
For historical reasons the bsadmin script contains also a number of functions which can (and should!) be carried out through the HTML interface. Furthermore, it provides features which are used during software development of the BSCW server software, e.g., for debugging purposes. Since these functions are only useful for the BSCW software developers but not for the normal BSCW server administrators, they are not explained below.
The commands marked with (I) are normally used during installation only and are invoked automatically. The commands marked with (D) provide debugging information (do not use without advice from support@orbiteam.de, otherwise you may damage your database).
When using the bsadmin command without any arguments, it displays the list of possible arguments as follows:
bsadmin archive         archive an artifact via command line
bsadmin check_key_table check keytable of database server                       (D)
bsadmin chkconfig       check configuration make directories and cgi scripts    (I)
bsadmin chkfiles        check for missing document files
bsadmin chkjobs         check for blocked jobs
bsadmin chksearchbag    checks SearchBag for superfluous entries
bsadmin chkurl          change URL object locations
bsadmin chkworkspaces   rebuild workspace list
bsadmin chpwd           change user password and lock/unlock user
bsadmin chtype          change content type of given document
bsadmin clean_anon      remove objects in "anonymous" top level folders
bsadmin conf_apache     BSCW Apache web server configuration
bsadmin conf_crontab    BSCW crontab configuration                              (2)
bsadmin conf_systemd    BSCW systemd configuration                              (2)
bsadmin conf_iis        BSCW IIS configuration                                  (1)
bsadmin conf_tzdata     configure timezone data
bsadmin create_index    generate search index                                   (3)
bsadmin dbcheck         database check/repair
bsadmin dbcopy          Copy database                                           (D)
bsadmin dbfindaddr      Find addresses accepted for maildelivery into folders   (D)
bsadmin dbfindid        Find all database offsets for object with given id      (D)
bsadmin dbfindmodules   Find (all) modules in which classes are looked up       (D)
bsadmin dbfindobj       Find (all) objectids for given classes                  (D)
bsadmin dbfindref       Find (all) references of given objects (i.e. ids)       (D)
bsadmin dblist          List, dump or debug database records                    (D)
bsadmin dbscan          scan database; print position, key, class and id        (D)
bsadmin dbsizes         Print record sizes in database file (Store)             (D)
bsadmin dbsummary       print a summary of all classes in the database
bsadmin dbtruncate      Truncate database at offset                             (D)
bsadmin du              show/update BSCW database disk usage
bsadmin extract         extract an artifact from commandline
bsadmin find            find (recursively) documents, e.g.:user/folder/.../doc
bsadmin fix_keys        remap mail address and user keys
bsadmin fsck            check file tree for obsolete files and directories
bsadmin garbage         BSCW garbage collector
bsadmin getconfig       get configuration info from config.py
bsadmin http            Control built-in http server
bsadmin index_page      generates an index page for the script directories
bsadmin info            prints basic info about BSCW server configuration
bsadmin keytab          print keytable of database server                       (D)
bsadmin ldapbind        change user LDAP binding(s)
bsadmin ldapupdate      synchronize BSCW users with LDAP
bsadmin ldif            export users to LDIF format
bsadmin level           manage level of proficiency
bsadmin license         request a new licence, check licence details or warn
                        about licence expiry
bsadmin listmeta        export metadata as CSV list
bsadmin listmetakeys    list standard meta elements
bsadmin listws          list (shared) workspaces, update workspace list
bsadmin ls              list documents given by file path
bsadmin lstevents       list events
bsadmin mailaccess      list all folders w/ enabled mail access
bsadmin mailaslink      list all documents w/ mail access token
bsadmin manage_servers  manage BSCW servers machine-wide
bsadmin members         add or remove users from workspaces
bsadmin mkfolder        creates folders
bsadmin oauth           list oauth consumers
bsadmin offtab          print offset table of database server                   (D)
bsadmin openid          list openids
bsadmin package         (un)install a BSCW package
bsadmin preview         generate Document preview documents
bsadmin prtactions      print all defined actions
bsadmin quota           user disk quotas commands
bsadmin register        registration of email addresses and new users
bsadmin rename          rename an user
bsadmin renameaddr      rename mail addresses using regular expressions
bsadmin report          modify report configuration
bsadmin rmevents        remove (dequeue) all events older than n days
bsadmin rmobj           remove BSCW folders/documents given by ID or filepath
bsadmin rmuser          remove an user
bsadmin rmwaste         remove objects from waste baskets (resp. clipboards)
bsadmin roles           add, edit or assign roles
bsadmin search          query pylucene index                                    (3)
bsadmin sendmail        BSCW mailer                                             (D)
bsadmin servaccess      BSCW access control service debugging                   (D)
bsadmin servuno         BSCW user notification service debugging                (D)
bsadmin service         manage Windows NT platform BSCW service                 (3)
bsadmin servuno         BSCW user notification service debugging                (D)
bsadmin start           start BSCW instance servers
bsadmin statistics      statistics from BSCW database
bsadmin stop            stop BSCW instance servers
bsadmin syncf           synchronizes BSCW folder with file system directories
bsadmin sysmsg          modify user sys_msg counter
bsadmin themes          generate the CSS files needed for the BSCW themes
bsadmin update_defaults update configuration files with new defaults            (I)
bsadmin users           list users and mail addresses
bsadmin versions        list/remove versions from document version stores
bsadmin virusfound      list document scan information
bsadmin wstat           print workspace statistic
bsadmin xml_tmpl        generate cached XHTML files for all XML templates

(1) only on Windows 11, Server 2019/2022/2025
(2) only on POSIX systems
(3) only if a content search package 'PyLucIndex' is installed
(I) required during installation
(D) for debugging only
7.3. User administration
The BSCW server can be configured to allow
- self-registration by users
- registration of new users only by the system administrator and possibly other authorized persons.
The variable MAY_REGISTER in the BSCW instance
configuration file (<bscw-runtime-path>/conf/config.py)
specifies which of the registration modes shall apply. When
self-registration is enabled, the name space of legal email addresses
may be restricted by using the variable
RESTRICT_MAIL .
Note that there are two forms of self-registration:
- a user may enter his own email address to become a newly registered user of a BSCW server.
- an already registered user may invite another person by using his or her email address.
In principle, a registered BSCW user is identified by his email address, i.e., a particular email address specifies exactly one BSCW user. Therefore, the “creation” of a new BSCW user starts with the specification of an email address, either through self-registration or by the system administrator through the administrator interface described in the preceding sections.
The specification of an email address for a user is the first step of the registration process. The second step is the allocation of a user name and password to this email address. After the first step and before the execution of the second step an email address is called pending.
For self-registration the BSCW server sends an email message with a “token” (the registration URL) to the specified email address that allows the execution of the second step (or the resetting of a password, see below). If the email message cannot be delivered (e.g., because the email address was wrong), the intended recipient will never receive this email and therefore cannot carry out the second step of the registration process, i.e., the email address remains pending forever. This two-step procedure ensures that email addresses of registered users are always correct, unless a user looses his or her email account later without providing a new email address. In this case the system administrator may correct wrong email addresses through the administration interface.
If an email address remains pending because email messages cannot be delivered to the given address (this may be annoying for the system administrator since he has to take care of the bounced emails) the system administrator can set such an email address to bounced. This has two effects: firstly, the respective address(es) will not produce any bounced emails any more since the BSCW server filters all outgoing email messages against the bounced addresses list. Secondly, the BSCW server does not allow the first step of the registration process for this email address any more.
This second effect can also be used to exclude particular persons from using a BSCW server: If the system administrator sets a particular email address to bounced, the user associated with this email address cannot re-register with the server any more using this bounced email address.
In the case of user registration through system administrators (see section 7.1 Administration using the Web Interface or section 7.2 Administration using the bsadmin script), they should be careful when entering the email address of new users since the verification process for the email addresses as in the case of self-registration is not carried out. Erroneous addresses would only be detected when the BSCW server sends an email message to such an address, assuming that someone takes care of bounced email messages. In the case that bounced email addresses are deleted automatically (some mail servers are configured that way), such erroneous addresses may not be detected at all. If, in the case of self-registration, a user enters an email message that is already associated with a registered user, the BSCW server acts as follows:
- If the user wants to register as a new user from the registration page, the system assumes that the respective user has forgotten his or her password. It therefore sends an email message to the email address, which allows the selection of a new password.
- If the user wants to invite another user to this server, the system assumes that the user was not aware that the other user was already registered. The system therefore replaces the invited user’s email address by the invited user’s login name.
7.3.1. User status with bsadmin users
To create reports about existing users the bsadmin users script provides the following options:
$ ./bin/bsadmin users
Usage:
 bsadmin users -{m|a|p|n [-T|-E|-I]} [{-o|-O} <ndays>] [-L<f>] [<u1> ... <un>]
 bsadmin users [-h]

     List users and mail addresses

 positional arguments:
     -m    print username(s) and primary mailaddress
     -a    print username(s) and all mailaddresses
     -p    print username(s) and passwords (htpasswd format)
        of all or given users <u1> ... <un>;
     -n    print username(s)
         sub-options:
         -T  append creation, last-access time stamps
         -E  append account-expiry, passwd-expiry, passwd-change time stamps
             ('=' marks user individual account/password expiry date)
         -I  append last ip address

 optional arguments:
     -L    consider locked users with lockflags <f> ::= {'a'|'l'|'s'|'e'}
         (locked by 'a' - admin, 'l' - LDAP, 's' - system, 'e' - expired)
     -o    consider users with last access before <ndays> days
     -O    consider users with creation before <ndays> days
     -h    show this help message and exit
7.3.2. User registration with bsadmin register
For the administration of users and their email addresses the bsadmin register script offers the following functionality:
$ ./bin/bsadmin register
Usage:
 bsadmin register <addr>                     show info about email address
 bsadmin register -a [-o<n>]                 print email addresses
 bsadmin register -b [-f<f>] [-o<n> [-d]]    print bounced email addresses
 bsadmin register -b [-m]  <addr>            set bounced
 bsadmin register -c <addr> [<lang>]         create pending email address
 bsadmin register -d <addr>                  delete email address
 bsadmin register -e [-o<n> [-d]]            print external email addresses
 bsadmin register -e <addr> [<lang>]         set external
 bsadmin register -i <addr>                  print user/<unknown>/<pending>
 bsadmin register -n <addr> <newaddr>        rename (change email address)
 bsadmin register -p [-f<f>] [-o<n> [-d]]    print pending email addresses
 bsadmin register -p <addr> [<lang>]         set pending
 bsadmin register -r <addr> <user> [<pwd> [<lang>]]  register new user
 bsadmin register -u [-o<n>]                 print allocated email addresses
 bsadmin register -u <addr> <user> [<lang>]  allocate secondary email address
 bsadmin register -U <addr> <user> [<lang>]  allocate primary email address
 bsadmin register [-h]                       show this help message and exit

 Registration of email addresses (and new users)

 Optional arguments:
 -f<f>      consider email addresses with flags <f> ::= {n|f|a}+
                 n - address w/o invitation
                 f - address w/  invitation to a folder (workspace)
                 a - address w/  invitation to an appointment
            (if option '-f<f>' is omitted, the default '-fnfa' is assumed,
            i.e. all <pending> email addresses are listed)

 -m         do not send email notification to user, who invited the address

 -o<n>      list email addresses with modification date before <n> days
 -o<n> -d   delete email addresses with modification date before <n> days
For instance to create a new user use the following command:
$ ./bin/bsadmin register -r name@domain.org name passwd
7.3.3. User management with bsadmin (rename | chpwd | rmuser)
The administration scripts bsadmin rename, bsadmin chpwd and bsadmin rmuser are allow to manage BSCW user accounts via command line. The bsadmin rename script renames user account names an provides the following options:
$ ./bin/bsadmin rename -h
usage: bsadmin rename [-h] [-n] oldname newname

rename a user

positional arguments:
oldname     existing name
newname     name to change to

optional arguments:
-h, --help  show this help message and exit
-n          don't send an email notification
The bsadmin chpwd script allows beside user account password changes to lock and to unlock user accounts or to maintain user account and password expiry settings as follows:
$./bin/bsadmin chpwd
Usage:
 bsadmin chpwd [-v]                                  <user> [<pwd>]
 bsadmin chpwd [-v] {-l|-u|-e} {-n <email>|--notify} [-a | <user>]
 bsadmin chpwd [-v] {-E <date>|-p}                   [-a | <user>]
 bsadmin chpwd [-v] [-r] {-e|-p}                     [-a | <user>]
 bsadmin chpwd [-h]

 Change user password and lock/unlock user

positional arguments :
 <user>           username
 <user> [<pwd>]   set new password for user

optional arguments :
     -l               lock user
     -u               unlock user
     -e               expire user (lock account if user is expired)
     -n <email>       send email notification BCC to email address
     --notify         send email notification to locked user only
     -a               all users
     -E <date/period> expire user at the time of 'date' or at the end of 'period'
                      ('yyyy-mm-dd[ hh:mm]' or '3d' or '5w')
     -r               reset password (-p) / account (-e) expiry
     -p               expire password (force password renewal at next login)
     -v               verbose (shows account details if no other option is given)
     -h               Show this help message and exit
Note
User accounts with administrative rights do not expire.
The bsadmin rmuser script removes user accounts from the BSCW system. When removing user accounts only private (non-shared) user data will be removed permanently, while data in shared workspaces is preserved. If the owner of a shared workspace is removed BSCW will determine a new owner among the remaining workspace members. In particular bsadmin rmuser provides the following options:
$ ./bin/bsadmin rmuser
Usage:
 bsadmin rmuser [-n|b|v] -a [-e <charset>] [-o <nowner>] [--dry-run] <user>
 bsadmin rmuser [-n|b|v] -m <nowner>                     [--dry-run] <user>
 bsadmin rmuser [-n|b|v] [-f]                                        <user>
 bsadmin rmuser [-h]

    Remove a user

options:
    -n            do not send an email notification
    -b            set user email address(es) invalid ("bounced")
    -m <nowner>   merge workspaces to <nowner>.
                Without option -b also merge email addresses.
    -a            archive users' artifacts in "var/data/rmuserarc" (zip)
    -o <nowner>   set owner of owned workspaces to <nowner> when archiving
    -e <charset>  encode pathnames as <charset> (default: UTF-8)
    --dry-run     verbose output and no changes are committed
    -f            force destruction of all owned workspaces
    -h            show this help message and exit
    -v ... -vv    verbose output
7.3.4. Additional anonymous users
Additionally to user anonymous, more anonymous users can be
registered. Access to these anonymous accounts are also not controlled
by authentication, but may be restricted by means of HTTP server
configuration, just as in the case of user anonymous. This way
different levels of access control can be implemented, from unrestricted
public access to anonymous intranet or even anonymous subnet access.
Adding an additional anonymous user requires (in this order):
- Configuration of an access control file (e.g.
u_intranet.txt), - Specification of an associated CGI path (i.e.
/intra/in<bscw-runtime-path>/conf/config.pySCRIPTS) - Configuration of the Web server (via bsadmin conf_apache (and restart of the Web server))
- Access to the newly created server CGI path (to create the new anonymous user)
Note
Additional anonymous users may be removed in contrast to the
system user anonymous.
The required steps in detail are as follows:
First you have to configure your Web server to handle restricted access to the anonymous prefix. For the Apache Web server, you would have to add:
Alias   /intra .../var/www
<Location "/intra">
    # use CGI scripts
    Options ExecCGI
    AddHandler cgi-script .cgi
    # set index file
    DirectoryIndex index.html default.htm
    Require all denied
    #some dedicated hosts (fqdn) or IP addresses may access
    Require host bscw.server.org
    Require ip 10.23.45.67
    # ...
</Location>
To automatically generate this configuration within your
<bscw-runtime-path>/conf/apache24/bscw.conffile you have to create a<bscw-runtime-path>/conf/apache24/u_<username>.txtfile which contains theRequiredirectives (Apache 2.4) for the allowed IP address ranges which may access the additional anonymous user prefix. Following the above example, create the file<bscw-runtime-path>/conf/apache24/u_intranet.txtand enter the followingRequiredirectives:Require host bscw.server.org Require ip 121.23.45.89
Next the creation of a new anonymous user must be accompanied by a adding a new entry in the
SCRITPSdictionary in the central configuration specification (<bscw-runtime-path>/conf/config.py). Select as key a new prefix for a directory mapping in the Web server and specify a tuple of the username, the directory (not used anymore, set to ‘’), the standard scripts and further scripts. For example:SCRIPTS = { '/sec/': (None, '', CREATE_SCRIPTS, SECURE_SCRIPTS), '/pub/': ('anonymous', '', CREATE_SCRIPTS, SECURE_SCRIPTS), '/intra/': ('intranet', '', CREATE_SCRIPTS, SECURE_SCRIPTS), }
Note
When the newly entered path is accessed for the first time via the Web server URI
/intra/bscw.cgithe specified username (e.g.intranet) is automatically created as anonymous user. If the username already exists and is a (non-anonymous) standard user a"Bad script name"error will be raised.Now execute the bsadmin conf_apache command to generate a new
<bscw-runtime-path>/conf/apache24/bscw.conffile and restart your Apache HTTP server.After these steps have been carried out, create the workspaces of the newly created anonymous user by accessing the the URL:
https://<server>/intra/bscw.cgi
7.4. Asynchronous Services
7.4.1. User Notification Services (UNO)
The user notification services (UNO) perform the following tasks
(depending on the configuration settings in the BSCW instance
configuration file <bscw-runtime-path>/conf/config.py):
- sending periodical workspace activity reports via email to give the users an overview about recent activities in a specific time period (e.g. daily)
- sending direct email notifications to inform the users about recent events
Using the user notification services a BSCW user does not need to
contact its BSCW server(s) so often to check for new events. If the user
notification services are activated, the users’ event preference page
provides a column for subscription of the “Daily Report” or the
“Direct Email” notification (depending on the UNO service
configuration). To activate the user notification services the BSCW
administrator has to start the additional UNO server
(bscw.adm.bs_servuno) in the SERVERS list in
<bscw-runtime-path>/conf/config.py
SERVERS = [
    ('UnoSocket', 'bscw.adm.bs_servuno'),
]
The UNO server sends HTTP requests to the BSCW server using a (virtual)
web server on localhost:HTTP_LOCAL_PORT (default localhost:80,
see HTTP_LOCAL_PORT).
If your web server is not listening to localhost you may need to
define an additional (virtual) web server running on
localhost:HTTP_LOCAL_PORT (for Apache HTTP server configuration
hints see section 3.4.1 Apache HTTP Server Configuration (unix) or section
4.5.2 Apache HTTP Server Configuration (windows)).
Note
This setting will start and stop the UNO server automatically with the BSCW database server.
The following variables have to be set for the configuration of the user notification services:
SERV_UNO_STATEdefines a file name for saving the state of the UNO service. The file is written, when the UNO is stopped and read when the server is started again.
SERV_UNO_TIMEScontains a dictionary of fine tuning parameters for the UNO service; for details see the server instance configuration file
<bscw-runtime-path>/conf/config.py.
WSREPORT = 1enables the daily workspace report
WSREPORT_DIRECT = 1enables the direct email notification
AUTOSUBSCRIBE_REPORTandAUTOSUBSCRIBE_REPORT_DIRECTdefine the default subscription for all users. By default no report is sent to new users, each user may Decide to subscribe to the workspace report by her/himself. The server administrator can change this behavior by setting the flag:
AUTOSUBSCRIBE_REPORT = 1
AUTOSUBSCRIBE_REPORT_DIRECT = 1
If this is enabled new users will automatically subscribed to the report service (each user may then unsubscribe from the service).
DEFAULT_EVENTMASKdefines the event type subscription mask, with the values:
read = 1; create = 2; move = 4; change = 8
By default all event types with excetion of read events are subscribed (
create + move + change = 14).
DEFAULT_EVENTMASK_DIRECTdefines the default event type subscription mask for the direct email notification. By default no event types are preselected, so user won’t be notified about any events immediately, but may select some event types for certain folders of interest only.
DEFAULT_EVENT_REPORT_DAILYdefines the default frequency for periodic email report which may either be daily (1) or weekly (0)
For example, set
WSREPORT_DIRECT = 1,AUTOSUBSCRIBE_REPORT_DIRECT = 1andDEFAULT_EVENTMASK_DIRECT = 2to enable the direct email notification service for all users by default, so each user will receive an email for each newly created object! (We do not recommend this setting though.)
WSREPORT_EVENT_LIMITdefines a size limit of the periodic workspace report: in order to prevent too long notification emails the number of events can be limited (use
WSREPORT_EVENT_LIMIT = 0for unlimited size)
REPORTLOGpoints to a file in which a protocol about the reports is logged, for example:
REPORTLOG = 'report.log'
7.4.2. User account expiry
To configure an inactivity time interval after which users are expired,
the administrator has to define in the BSCW instance main configuration
files <bscw-runtime-path>/conf/config.py the EXPACCT directive. E.g configure the following value:
EXPACCT = '360d'
In this case user accounts are expired, after 360 days without login.
To automatically check user account expires, the expire.sh shell
script must be daily executed:
copy the script from the BSCW distribution directory
<bscw-dir>/lib/bscw-|rel|-py27/etc/bin/expire.shto the<bscw-runtime-path>/bindirectory, e.g.$ cd /opt/bscw/lib/bscw-5.2.7-<rev>-py27 $ cp ./etc/bin/expire.sh <bscw-runtime-path>/bin $ cd <bscw-runtime-path> $ chmod 700 bin/expire.sh
create a “crontab” entry as follows:
$ crontab -e
10 1 * * * <bscw-runtime-path>/bin/expire.sh >> <bscw-runtime-path>/var/log/expired.log
to notify the user about account expiration enable the package
expirewith:$ bin/bsadmin package -e expire
Note
If no automatic expiry check (and user account locking) via
expire.sh is run periodically, user accounts will only
expire (and locked) if the user explicitly logs in after the in
EXPACCT defined period. This may result into an
incomplete listing of inactive (and locked) accounts in the user
management.
7.4.3. Automatic disk usage update
To provide an automated update of the storage usage of the BSCW database and uploaded documents displayed on the administrator BSCW status page (see section 7.1.1 BSCW status page) the bsadmin du script (disk usage) is available:
$ bin/bsadmin du -h
usage: bsadmin du [-h] [-v] [-u]

show/update BSCW database disk usage

optional arguments:
  -h, --help  show this help message and exit
  -v          verbose
  -u          update (re-calculate) BSCW database disk usage
To periodically re-calculate the storage usage configure the following “crontab” entry:
$ crontab -e
15 2 * * * <bscw-runtime-path>/bin/bsadmin du -u
7.5. Public space deactivation
By default BSCW allows users in the “manager” role to publish the contents of a folder in a “public space”, which can be accessed by everyone over the World-Wide Web without being a registered user of the server.
To disable the “public space” for all users a BSCW administrator may
delete the public folder contained in the Communities folder as
follows:
Log in a second time with password at to gain BSCW administrator rights. After successful login to the page press to keep the administrator rights for your current session. The administrator status is indicated by an
Adminlabel at top of the BSCW user interface.Enter your
Communitiesfolder by clicking
in the instant access bar.
Delete the
publicfolder as shown: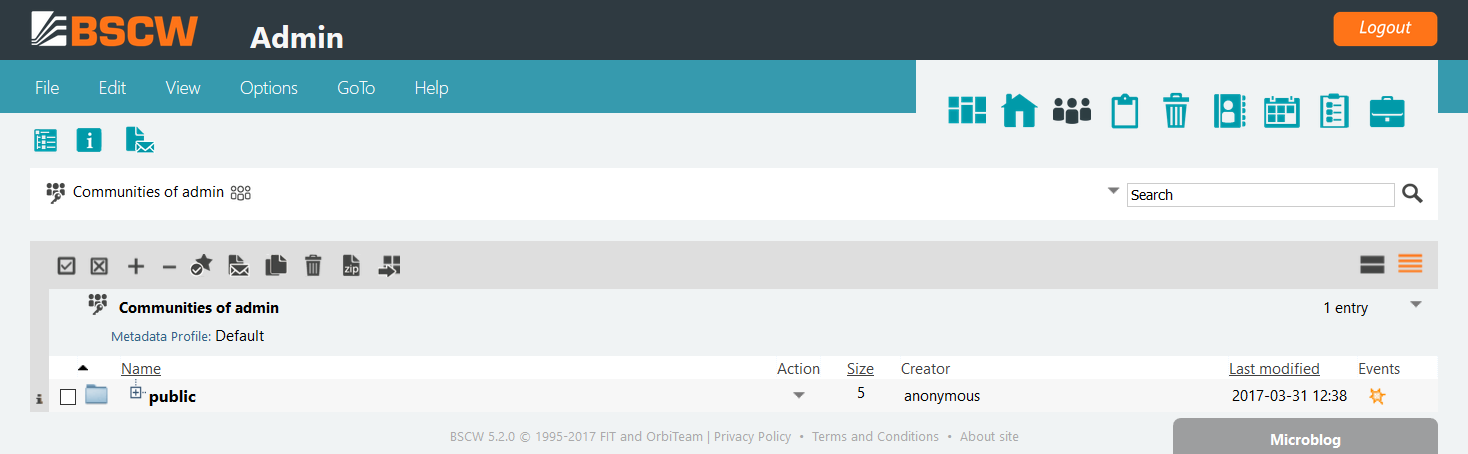
Note
Using the action will move the
publicfolder to your trash.
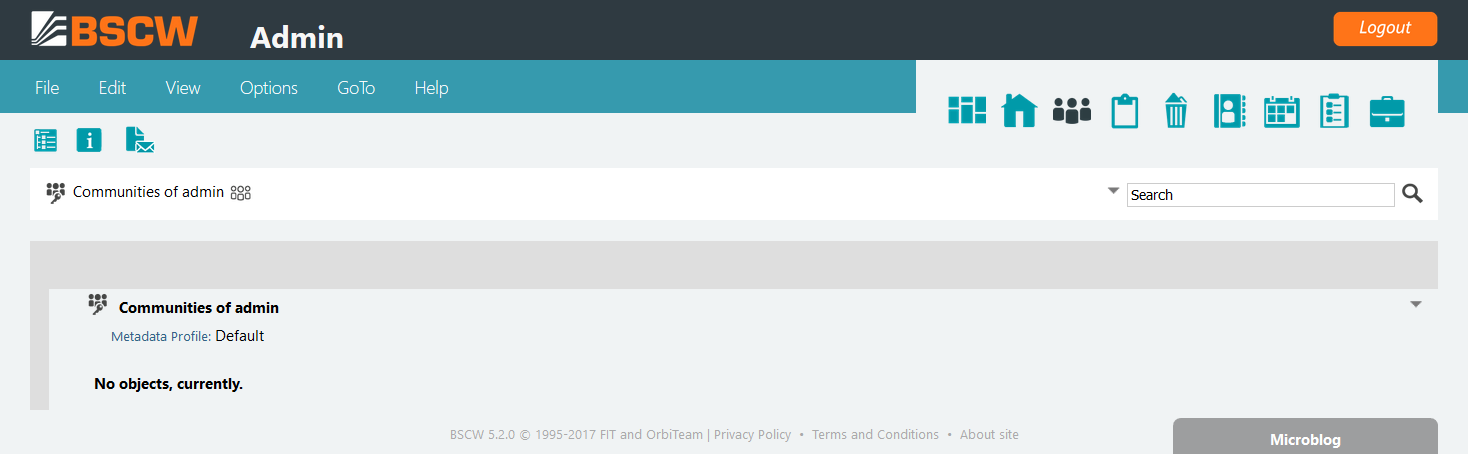
To disable the “public space” it is sufficient to keep the public
folder in your trash. If you the public
folder within your trash all “public spaces” are removed by uninviting
the anonymous (pseudo-) user.
To enable the “public space” again, you can create a new folder with the
name public in your My Communities folder. In particular follow
this procedure:
Log in a second time with password at to gain BSCW administrator rights. After successful login to the page press to keep the administrator rights for your current session. The administrator status is indicated by an
Adminlabel at top of the BSCW user interface.Enter your
Communitiesfolder by clicking
in the instant access bar
Open the form and assign the manager role to your account by the selection of
[x]
Manager
. Afterwards click .Create a new folder with . Enter the name
publicand click .Open the form again and click and afterwards
Finally run from the command line
$ cd <bscw-runtime-path>
$ ./bin/bsadmin fix_anonymous
7.6. WebDAV
WebDAV is an acronym for “Web-based Distributed Authoring and Versioning”. It is a set of extensions to the HTTP protocol (IETF RFC 2538) which allows users to collaboratively edit and manage files on remote Web servers, i.e., some of the BSCW features (e.g., document upload to a BSCW server or renaming of a document on a BSCW server) are also supported by the WebDAV protocol.
BSCW supports (a subset of) the WebDAV protocol. This means that some of the BSCW operations which are available via a Web browser and through the HTML interface of BSCW, are now also available via WebDAV clients (https://www.webdav.org) for software supporting the WebDAV standard).
Note
There are many WebDAV clients available and we could only test a small subset of them with BSCW WebDAV support. From our tests we assume that not all WebDAV clients fully conform with the WebDAV specifications, i.e., you may have problems when using a particular WebDAV client with BSCW.
The BSCW WebDAV interface mandatory requires the Apache HTTP server. After the installation of the Apache HTTP server run bsadmin conf_apache (with BSCW user ID):
$ cd <bscw-runtime-path>
$ ./bin/bsadmin conf_apache
This creates new <bscw-runtime-path>/conf/apache24/ files (cf.
section 3.4.1 Apache HTTP Server Configuration (unix) / section 4.5.2
Apache HTTP Server Configuration (windows)).
7.6.1. Microsoft Support for WebDAV
More recent Microsoft Windows and MS Office versions (Office 2016, 2019) provide WebDAV support. This allows the following applications:
Opening of BSCW workspaces within Windows Explorer. Proceed as follows:
Select “My Network Places” (either from your desktop or within Windows Explorer).
Select “Add Network Place”
Enter the URL of your BSCW home folder (or a sub-folder). This has the form
https://bscw.domain.org/sec/bscw.cgi/9620
https://bscw.domain.org/sec/bscw.cgi/home
Click “Finish”.
You may then browse with Windows Explorer through your BSCW workspaces in the same way in which you browse through the file system on your local computer. You may also “drag and drop” files from your local file system to BSCW folders or vice versa. When clicking the right mouse button, you may carry out several actions such as deleting or renaming an object.
Editing of MS Office files in BSCW workspaces. Proceed as follows:
- From within Windows Explorer (see previous example) select, e.g., a MS Word document within a BSCW folder.
- Open the document by double-clicking it.
- Edit the Word document as usual.
- After editing the document. The document will be saved back into the BSCW folder.
7.6.2. Known Problems
The Microsoft implementation of WebDAV is not fully compliant with the WebDAV RFC which may cause some problems. The following problems are already known:
- The RFC requests a special encoding of spaces and non-alphanumeric characters. MS Internet Explorer and Windows Explorer do not process such characters correctly. (Recommendation: Use only alphanumeric names (without spaces) for BSCW objects when MS Internet Explorer or Windows Explorer shall be used as WebDAV clients).
- Dialog boxes and error messages are sometimes misleading.
- Drag and Drop within the same directory results in a copy operation.
- Windows requires a SSL encrypted connections via HTTPS
(
https://...) to allow WebDAV access.
See also
Section 10.1.7 How do I connect to BSCW using WebDAV?. Please inform us if you observe additional problems.
7.7. Quota - Disk Usage Limitation
BSCW quota individually allows to restrict the amount of disk usage for users. In order to enable the BSCW quota system, the administrator has to define in a first step limit classes. Afterwards quota can be turned on for all or individual users by assigning a limit class to this users.
The BSCW disk space allocated to each user (quota) is computed as follows:
- When a user creates an object, the disk space used by the object is added to the quota of the owner of the folder wherein the object is created.
- In particular, when user A creates an object in a folder that is owned by user B, the quota of user B is affected, not the quota of user A.
- If the owner of a folder is removed from its members’ list (either by others or by himself or herself), the ownership of the folder and of the objects therein is transferred to another person who still has access to this folder.
- This new procedure for computing the quota of users has the effect that users can always access all objects that contribute to their quota.
Note
By default quota is now enabled for the anonymous user to avoid the assignment of any resources to the anonymous user. To explicitly disable quota limitation for the anonymous user run the command bsadmin quota off anonymous. Alternatively you may assign a new limit class to the anonymous user with the command bsadmin quota on -c <classname> anonymous
Quota is accessed by the BSCW administrator via the bsadmin quota command line interface. In general the bsadmin quota command supports the following four options
bsadmin quota limit              defines and lists all limit classes;
bsadmin quota { on | off }       enables/disables quotas for all or individual users;
bsadmin quota { check |fix }     checks or fixes disk and object usage for all users;
bsadmin quota { report | class } report quota for users or limit classes
The bsadmin quota command executed without any argument displays the usage information:
$ ./bin/bsadmin quota
Usage:
 bsadmin quota
 bsadmin quota { check | fix }                           [<u1> ... <un>]
 bsadmin quota class                                     [<c1> ... <cn>]
 bsadmin quota report [-b][-t]   [-L][-v]                [<u1> ... <un>]
 bsadmin quota on                    [-v]                [<u1> ... <un>]
 bsadmin quota on            -c <c>  [-v]                [<u1> ... <un>]
 bsadmin quota on            -R      [-v]                [<u1> ... <un>]
 bsadmin quota off                   [-v]                [<u1> ... <un>]
 bsadmin quota limit                 [-v]
 bsadmin quota limit            <c> { disk | objects } <soft> <hard> <time>
 bsadmin quota limit         -d <c> [ disk | objects ]
 bsadmin quota [-h]

    User disk quota commands

options:
    check|fix        checks/fixes current disks and objects usage for all users
    class            report users for all specified classes
    report           report quota for all or specified users
    report -a        usage accumulation of specified users
    report -l        only quotas exceeding soft limits are shown
    report -L        only quotas exceeding limits are shown
    on               (re-)enable quota for all or specified users
    on    -c <c>     set and enable quota class <c> and for all or specified users
    on    -R         reset quota timer for all or specified users
    off              disable quota for all or specified users
    limit            report quota limit classes
    limit -d <c>     delete quota class <c>
    limit -d <c> <l> delete quota limit <l> ::= { disk | objects } for class <c>
    limit    <c> <l> add/replace quota limit class <c> for limit <l>
    -v               verbose output
    -h               show this help message and exit
With the following option parameters:
<u1> ... <un>    string             list of registered BSCW user names
<c>              string             limit class name

<soft>           integer [char]     limit value in bytes or in kilo (mega,
<hard>                              giga, tera) bytes with unit token 'K'
                                    ('M', 'G', 'T').

<time>           integer [char]     limit value in seconds or in minutes
                                    (hours, days, weeks) with time token 'm'
                                    ('h', 'd', 'w').
7.7.1. Limit Classes
A limit class specifies the amount of disk resources an user may use. Limit classes are manipulated with the bsadmin quota limit option, which allows the following parameters:
bsadmin quota limit [-v]
bsadmin quota limit         <c> { disk | objects } <soft> <hard> <time>
bsadmin quota limit      -d <c> [ disk | objects ]
Listing of Limit Classes
The command bsadmin quota limit prints a list of all defined limit classes.
$ ./bin/bsadmin quota limit
                         Disk                   Objects
                 soft    hard   time     soft    hard    time
default            0      0      0s        0      0       0s
develop           40M     80M    2w       400     800     2w
The soft value actually defines the amount of resource usage a user may allocate. The hard value defines the maximum amount of resource usage at a time. The time value defines the maximum time period a user may exceed the soft limit.
If an user exceeds her/his hard limit or does not reduce her/his resource usage below the soft limit after expiration of the time limit, the user account gets locked. If an user account is locked only delete actions may be performed. The account automatically becomes unlocked if the user lowers her/his resource usage below the soft limit.
Definition of Limit Classes
A limit class is defined by the amount of disk space (disk limit) and the number of objects (object limit). In order to activate the BSCW quota system the administrator has to define at least one limit class and assign limits to this class.
Disk/Objects Limits
In the following example the
developclass disk limit is set to 40 Mbyte soft and 80 Mbyte hard limitation with a time period of 2 weeks. In the second step the objects limit is set to a value of 400 objects soft and 800 objects hard limit and with a time period of 2 weeks:$ ./bin/bsadmin quota limit develop disk 40M 80M 2w $ ./bin/bsadmin quota limit develop objects 400 800 2w
Limit Class ``default``
To enable quota immediately for new registered users the BSCW quota system supports a special limit class
default. If a disk or a objects resource limit is defined for this class, quota is automatically enabled for all new users. In this case new users are assigned to thisdefaultlimit class. Example:$ ./bin/bsadmin quota limit default disk 10M 15M 1w $ ./bin/bsadmin quota limit default objects 200 300 1w
To disable this feature the
defaultlimit class must be removed with the command:$ ./bin/bsadmin quota limit -d default
7.7.2. Quota Activation
The administrator may enable (disable) quota for users with the bsadmin quota on (bsadmin quota off) command.
Enable Quota
If no limit class is specified with the -c <c> switch, the
bsadmin quota on command enables quota for the specified
user(s) and assigns them to the default limit class. Examples:
Enable quota for all users with assigned default limit class:
$ ./bin/bsadmin quota on
Enable quota for the individual users bob and claire and assign them to the
developlimit class:$ ./bin/bsadmin quota on -c develop bob claire
Change quota limit class for user alice to class
default:$ ./bin/bsadmin quota on -c default alice
Disable Quota
Quota may be disabled for all or individual user(s) with the bsadmin quota off command. Examples:
Disable quota for user dave
$ ./bin/bsadmin quota off dave
Reset the quota limit timer for soft quotas
$ ./bin/bsadmin quota off -R dave
Disable quota for all users
$ ./bin/bsadmin quota off
Note
To disable automatic quota activation for new users the
default limit class has to be removed (see above).
7.7.3. Calculation of current disk usage
If quota is enabled for an existing user, the users’ usage counters should be fixed to take the users current resource usage into account. For this purpose the BSCW quota system provides the commands
$ ./bin/bsadmin quota check
$ ./bin/bsadmin quota fix
The check command only proofs if the users’ usage counters match the
current (real) resource usage, while the fix command sets the users’
usage counters to the current (real) resource usage.
Caution
- To determine the current resource usage of an user, the bsadmin quota fix command has to examine all stored documents of the BSCW server. Depending on the number of stored documents this may take a long time.
- Never run bsadmin quota fix while garbage collection is executed.
7.7.4. Report disk usage
The bsadmin quota report command prints a summary of the disk usage and quotas for all users:
$ ./bin/bsadmin quota report

                        Disk                           Objects
User            usage   soft    hard  time        usage   soft    hard  time
alice   +-      11.1M    10M     15M  3.3d          150    200     300
bob     --      39.9M    40M     80M                345    400     800
claire  --        12M    40M     80M                 94    400     800
For each user (with quota enabled) the current amount of disk space and number of objects is printed, along with any quotas of the users limit class.
If you additionally specify user names(s), a report is only generated for the given user(s):
$ ./bin/bsadmin quota report claire alice

                        Disk                           Objects
User            usage   soft    hard  time        usage   soft    hard  time
alice   +-      11.1M    10M     15M  3.3d          150    200     300
claire  --        12M    40M     80M                 94    400     800
The additional switches -t or -L restrict the output of the quota report command to these users who are exceeding their soft limits (-t) or their limits (-L).
7.8. Definition of Roles
In the following section first a brief introduction in the BSCW role concept is presented. Then the definition of BSCW system defined roles is explained in detail and finally a simple mechanism to configure site-specific roles is given.
7.8.1. The BSCW role concept
In BSCW access rights are determined by the role or roles that a user holds. Roles are sets of actions that are allowed for the holder of a role. Users can be assigned one or more roles for an object at the same time. When a user holds a role, she may execute an action on the object if and only if the role includes that action. If a user holds multiple roles for an object, she is granted permission to the union of actions of all roles.
The scope of a role is the object for which a user holds that role and everything inside the object, unless and until the user is re-assigned another role. The role is thus valid for the object’s scope: the object itself and its contents recursively. Roles are said to be inherited from a container object to its contents. Though this is also true for special containers like user’s Home or Clipboard, the user’s role in those special containers are not inherited to shared folders which are contained therein.
Example:
A user is by default the Manager of her Home space and of all objects and all sub-folders she perceives therein the default role Manager is inherited to the Home folder’s scope.
Assume that the user is now invited to a shared folder called Project Documentation, the inviting user assigns a role to her, say guest. The new member then holds the guest role for the entire Project Documentation and its contents. On the other hand, the shared folder Project Documentation appears top-level in the Home space of the new member. What roles will she play in the Project Documentation folder? If the role Manager, which she holds in her Home space, were inherited to Project Documentation, the user would hold Manager rights on the shared folder as well as guest rights which were assigned to her. To prevent this, special containers like Home, Clipboard, Waste do not inherit their roles to shared folders below. Instead, for shared folders inherit role assignments only from other shared folders.
In general roles in BSCW are either predefined by the system or defined by end-user (action “add role”). In the former case, the role can be applied to all BSCW objects. In the latter case, the role can only be assignment within the object’s scope.
All roles (normal roles and special roles, see below) can be re-defined (“edit role”) for any object, thereby changing the set of actions which are allowed for an object. In this case the changed role definition is valid for that object and its content recursively, but not for any other object. This means that there can be more than one role with the same name which have different scopes and different access rights definitions. There are different types of roles in BSCW:
Normal Roles
Normal roles in BSCW are roles which may be assigned to users without
restrictions. Internally, these roles are prefixed by R2 for
predefined roles and by r for user-defined roles. End-users can only
define (“Add role”) normal roles.
Examples: R2member, R2user, R2manager, user-defined roles in
workspaces like “Teacher” or “Student”.
Special Roles
Special roles are roles which are restricted in the way in which they
can be assigned to users or special in the way in which they are
inherited. Their internal prefix is either R0 or R1. Only system
administrators can define special roles; this is done in an extra
local_roles package (see section 7.8.3
Site-specific Roles).
End-users cannot define (via “Add role”) special roles, but they may
re-define (“Edit role”) R0 or R1 roles. As with normal roles,
the changes which an end-user applies to a special role are limited to
the object’s scope.
System-defined roles: ``R0`` roles
System-defined roles are special roles which the system needs and which
only the system can assign to users. In particular, users cannot be
invited to workspaces in R0 roles. By default, there are 2
system-defined R0 roles in BSCW: R0creator and R0owner.
R0creator- is assigned to the creator of an object and is never re-assigned to another user.
R0owner- is by default assigned to the creator of an object, if created
top-level (e.g., in the users’ home or clipboard). Ownership is
inherited to the object’s scope: this means that the special role
R0owneris assigned to all objects within the object’s scope recursively.
Restricted roles: ``R1`` roles
Restricted R1 roles behave differently from normal roles when the
role holder is invited to a workspace. If a user holds a R1 role and
is invited to a workspace in another role, the invited role is simply
ignored by the system. Instead, for that workspace the system assigns
the special restricted role "R1anonymous" to the user.
The reason for this seemingly strange behavior lies in the past: recent
BSCW systems allowed to invite the special user “anonymous” to
workspaces, but restricted the anonymous user in its access rights.
Younger BSCW systems must ensure the restricted access of anonymous
users also for older BSCW databases. If, for instance, a group of users
which contains the anonymous user is invited to a workspace holding the
role R2manager, the anonymous user would automatically inherit the
enhanced access rights of R2manager. This would be in contradiction
to older BSCW systems and might grant the anonymous user access rights
which were not intended in older BSCW databases.
Examples: R1anonymous (defined in all BSCW systems), R1observer
Assignment of roles
Normal roles and restricted roles are assigned in two ways:
- when inviting users to the members group of a workspace or other object
- explicitly for a user using the action “Assign role”
The former case allows to assign roles not only to users, but also to groups of users. This may lead to multiple roles a user holds: invite two groups of users which both contain a certain user.
The latter case is only possible for individual users, not for groups of users. It may be used to re-assign a role to a particular user who was invited as member of another group (the group being invited in another role).
When inviting users to a members group, any role which is defined
globally or in that object’s scope may be assigned to individual users
or to groups of users. This includes restricted roles (R1 roles),
but not system-defined roles (R0 roles).
Special roles can either not be assigned at all (R0 roles) or they
behave differently when being invited (R1 roles). Cf. above for
details.
What are user roles?
User roles are roles which are not assigned to a user in the scope of an object, but which are mapped to a user herself. User roles are valid for that user throughout the system and determine access rights to private data spaces of a user.
Only system administrators can assign a user role to a user (with
“Assign Role” to an user object). The system administrator keeps a list
of user roles available in user_roles. User roles can either be
normal roles (R2 roles) or restricted roles (R1 roles).
The user role in which a user is registered or which a system administrator assigns to her determines the access rights to her private data spaces: her home space, clipboard, etc. By default, all private objects inside the private data spaces are subject to the user role which a user holds. Only when a user is invited to shared spaces, different roles are assigned to her and overrule her user role.
If a user is registered holding a restricted (R1) user role, she is
restricted to the special "R1anonymous" role in all workspaces to
which she is invited. This is regardless of the definition of her actual
R1 user role. Therefore, user roles should in general be normal roles.
By default, BSCW user roles are set to “Manager” (R2manager, see
default_user_role below). You may define your own role (e.g.
R2user) and redefine the default role for registered users in your
local <bscw-runtime-path>/conf/config_action.py.
Extended access rights for the BSCW administrator
BSCW administrators may always execute the actions “Change role”, “Assign role” and “Owner” on all folders, independent of their membership. Besides they may execute the action “More information” for all artifacts, and have the right to open all folders.
Because of the extensive rights that a BSCW administrator has (and must have), the administrator is not a role in the sense of the BSCW role concept for security reasons. It must be avoided under all circumstances that the property of being a BSCW administrator can be manipulated from the user interface.
7.8.2. Role definition and default roles
In general roles are defined as a union of action views. Action views are sets of actions specified for easier action handling. Action views are bit encoded, i.e. are defined as powers of 2. Currently there are the following different views (all views have language dependent names defined in <bscw-pkg-dir>/bscw-5.2.7-<rev>-py27/bscw/msg/<lang>/lg_msgconfig.py)
action view         value description

view('get')             1 actions involve 'read' access to an object,
                          e.g. the get operation itself, copy , or convert
view('get_ext')         2 actions involve 'read' access to
                          meta data (description, info page), e.g. info.
view('add')             4 actions create a new object
view('add_ext')         8 actions create a new object
view('change')         16 actions involve 'write' access to an object,
                          e.g. actions that modify an object
view('change_ext')     32 actions move an object, i.e. change both the
                          source and the target container
view('owner')          64 actions exclusively for the owner of an object,
                          i.e the destroy action.
view('share')         128 actions affect the access rights of an artifact
                          (excluding role management), e.g. adding
                          a member.
view('share_ext')     256 actions for role management, e.g. assigning
                          a role.
view('edit')          512 actions for editing articles, attachments or
                          appointments.
view('user')         1024 actions concern user information,
                          e.g. editing user details, sending e-mail.
view('waste')        2048 actions possible in the waste, e.g. destroy
                          and undelete.
view('lock')         4096 actions for lock/unlock objects.
view('attend')       8192 actions allowed for attendees of an appointment.
view('creator')     16384 actions for the creator of an artifact, eg.
                          edit and cut actions.
view('responsible') 32768 actions for the responsible of a task.
view('specialtags') 65536 actions to tag roles/artifacts.
A view comprises all actions that have this view assigned. The
definition of a new view is done with the view() function.
Next we come to the definition of roles. The names of the predefined
standard roles have the form Ri<name>, where i is a digit
indicating the role type: 0, 1 or 2 standing for system-defined,
restricted and normal, respectively. All standard roles are defined
in the dictionary default_roles as follows
standard_views = (
    view_get | view_get_ext |
    view_add | view_add_ext |
    view_change | view_change_ext |
    view_waste)

complete_views = (
    standard_views | view_user | view_share | view_edit)

default_roles = {
    'R0creator': view_edit | view_creator,
    'R0hidden': 0,
    'R0other': 0,
    'R0owner': view_owner,
    'R1anonymous': view_get,
    'R1restricted': view_get | view_get_ext,
    'R2lockbag': view_lock,
    'R2associate': standard_views,
    'R2attendee': 0,
    'R2manager': complete_views | view_share_ext,
    'R2member': standard_views | view_user | view_share,
    'R2responsible': complete_views | view_responsible,
    'R2waste': view_waste,
}
The names of these predefined roles at the user interface are those that we introduced above. Internally, the standard predefined roles also have aliases that are used in BSCW kernel code.
other_role = 'R0other'              special role "is a registered user"
owner_role = 'R0owner'              special owner role
creator_role = 'R0creator'          special creator role
anonymous_role = 'R1anonymous'      default role for anonymous users
default_user_role = 'R2manager'     default role for registered users
attendee_role = 'R2attendee'        default role for attendees (appoint.)
default_role = 'R2member'           default role for invitations
responsible_role = 'R2responsible'  responsibles for tasks etc.
BSCW defines the following roles:
“Restricted” Roles (BSCW core)
Anonymous member
“read-only” role for the pseudo member “anonymous” (to publish sub folders) without info-right
Restricted member (*)
“read-only” role for the usual members with info-right (descriptions are shown)
“Normal” Roles (BSCW core)
Member (*)
default role when inviting members with all read/write rights.
Note
The default “Member” role allows members to invite/uninvite other member (“share view”), which is probably not desired.
Associate member (*)
default role for Communities (like Member role without “share view”)
Manager (*)
- workspace manager with the right to alter and assign roles (plus member rights)
- default role for user top level objects: home, clipboard, waste.
Participant
special calendar role for the participants of an appointment
Additional “normal” roles (BSCW packages):
Requestor
role the requestor of a task holds (when started) (task package)
Contractor
role the contractor of a task holds (when started) (task package)
Responsible
role of the member who holds currently a flow folder (FlowFolder package)
System roles:
Creator
assigned by the system whenever a user creates a new object; normally allow cut/delete (If you withdraw the cut/delete right from the “Member” role, the “Creator” role will still allow creators of an object to delete it).
Registered User
this are all users of the system, like the Unix ‘other’ rights
Owner
The Owner role is assigned to each users top-level objects (home, clipboard, waste etc.) and inherited along the folder hierarchy. It is used to assign resource usage for the quota limitation.
(*) only these roles are shown in the “Invite Member” resp. “Assign Role” form.
All other roles are assigned automatically by the system and should therefore not assigned manually.
7.8.3. Site-specific Roles
In order to customize the default BSCW system roles settings it is
possible to redefine roles using the BSCW instance action configuration
file (<bscw-runtime-path>/conf/config_action.py). The action
configuration file allows to adapt BSCW kernel (core) actions and
roles:
<bscw-runtime-path>/conf/config_actions.py # "core"
BSCW package actions and roles may be redefined in a package action
configuration file
<bscw-runtime-path>/conf/<package-name>/config_actions.py for
each available package.
If you want to adapt the BSCW system roles setting use the
$ ./bin/bsadmin prtactions –-print-conf
command line script to create a template action configuration file for each package. For convenience, each action configuration file template contains the action names for a package.
In the following, we give an example for extending BSCW system defined
roles (as described above) by adapting the action configuration file
<bscw-runtime-path>/extensions/customroles/conf/config_actions.py
in an new package customroles.
We will define five new roles, “Learner”, “Author”, “Domain manager”, “Field manager”, and “Educational advisor”.
To define language dependent translations for the roles name we create the following language dependent messages files for our BSCW instance.
See also
Section 5.28 msg/<lang>/lg_msgconfig.py
<bscw-runtime-path>/extensions/customroles/msg/de/lg_msgconfig.py
<bscw-runtime-path>/extensions/customroles/msg/en/lg_msgconfig.py
Here are the file contents:
###########################################################################
# File
#   <bscw-runtime-path>/extensions/customroles/conf/config_action.py
# The actions that are initially allowed for the new roles are
# given by 'or'-ing some bit_masks ("views")

# Note: The names of standard system defined roles must start with
# 'R2'. User friendly translations are defined in
# <bscw-runtime-path>/extensions/customroles/msg/*/lg_msgconfig.py

default_roles['R2learner'] = (
    view_get | view_get_ext | view_change | view_share)

# We might also use the default action set of other roles that are already
# defined (e.g. 'R2member'):

default_roles['R2author'] =\
    default_roles['R2dommanager'] = \
    default_roles['R2fldmanager'] = \
    default_roles['R2eduadvisor'] = \
    default_roles['R2member']

# Note: Obviously it makes some sense to define different Roles that have
# the same actions allowed *initially*

###########################################################################
# File
#   <bscw-runtime-path>/extensions/customroles/msg/en/lg_msgconfig.py
# User friendly names for new roles defined in
#   <bscw-runtime-path>/extensions/customroles/conf/config_action.py

R2learner = 'Learner'
R2author = 'Author'
R2dommanager = 'Domain manager'
R2fldmanager = 'Field manager'
R2eduadvisor = 'Educational advisor'

###########################################################################
# File
#   <bscw-runtime-path>/extensions/customroles/msg/de/lg_msgconfig.py
# User friendly names for new roles defined in
#   <bscw-runtime-path>/extensions/customroles/conf/config_action.py

R2learner = 'Lerner'
R2author = 'Autor'
R2dommanager = 'Domänenmanager'
R2fldmanager = 'Branchenmanager'
R2eduadvisor = 'Aus- und Weiterbildungsberater'
After defining te custom roles the package customroles must be
enabled with:
bin/bsadmin package -e customroles
7.9. Site-specific banner
To customize the BSCW look you may specify a custom welcome message and insert a logo of your organisation into the BSCW index page. Additionally you can add a banner of your organisation at the top of each BSCW page. To insert a site-specific welcome message and logo into the index page or a banner at the top of each BSCW page follow these steps:
Create a BSCW instance specific resources directory
<bscw-runtime-path>/var/www/local/iconswhere to store your (customized) resource icons:$ cd <bscw-runtime-path> $ mkdir -p ./var/www/local/icons $ chmod 755 ./var/www/local ./var/www/local/icons
Copy a index logo or banner logo PNG image of your organisation called
logo_index.pngresp.logo_banner.pnginto the extensions resources icon directory (<bscw-runtime-path>/var/www/local/icons):$ cd <bscw-runtime-path> $ cp logo_index.png logo_banner.png ./var/www/local/icons $ chmod 644 ./var/www/local/icons/icons/logo_index.png $ chmod 644 ./var/www/local/icons/icons/logo_banner.png
Run bsadmin conf_apache to make the local resources directory available to your Apache HTTP server configuration.
Add an entry
index_logoresp.server_logoto the file<bscw-runtime-path>/conf/config_icons.py. Additionally you need to specify the image size(width, height):index_logo = ('logo_index.png', (766, 132)) server_logo = ('logo_banner.png', (220, 48))
Note
The height of your banner image (
server_logo) may not exceed48pixels.To specify a custom welcome message for the BSCW index page define the INDEX_MSG configuration directive in the BSCW instance configuration file
<bscw-runtime-path>/conf/config.py(see BSCW appearance settings).Run bsadmin index_page to generate new BSCW index pages
7.10. Server-wide template folders
By using the action BSCW users may create new objects by copying it from an existing template. Any BSCW object can serve as a template, e.g. documents of any kind, polls, flow folders and tasks or even folders including their entire contents.
All templates to be copied either come from special template folders
which are placed into the BSCW repository or from files which are placed
in a special directory within <bscw-runtime-path> (see item 4
below). Template folders are special folders which you create by
invoking and which
you then fill with template objects. They are indicated by a special
“template folder” icon.
The templates that are being offered for copying in the Template selection list come from template folders in the following places:
The users’
Personal TemplatesfolderTemplate folders in the current folder or template folders in folders on the current path
- BSCW will also consider template folders which are contained in folders on the path upwards from the current folder to the top level folder.
- Only template folders directly contained in folders on the current path are considered.
System-wide template folders/documents
These are template folders which are accessible to all registered users. System-wide template folders are created and managed by the BSCW administrator only.
Additionally the BSCW administrator can provide document templates in a dedicated directory. The default document template directory is located at
<bscw-runtime-path>/etc/doc_templates/The administrator might copy default documents into this directory. See also in the BSCW distribution directory <bscw-path>/lib/bscw-5.2.7-<rev>-py27/etc/doc_templates/ for some basic template documents
To create a system-wide template folder:
Log in a second time with password at to gain BSCW administrator rights. After successful login to the page press to keep the administrator rights for your current session. The administrator status is indicated by an
Adminlabel at top of the BSCW user interface.Enter the
Personal Templatesfolder of theanonymoususer by entering the URL:https://bscw.domain.org/sec/bscw.cgi/ranonymous
Note
The leading lowercase “r” is a shortcut to address the template folder of anonymous user.
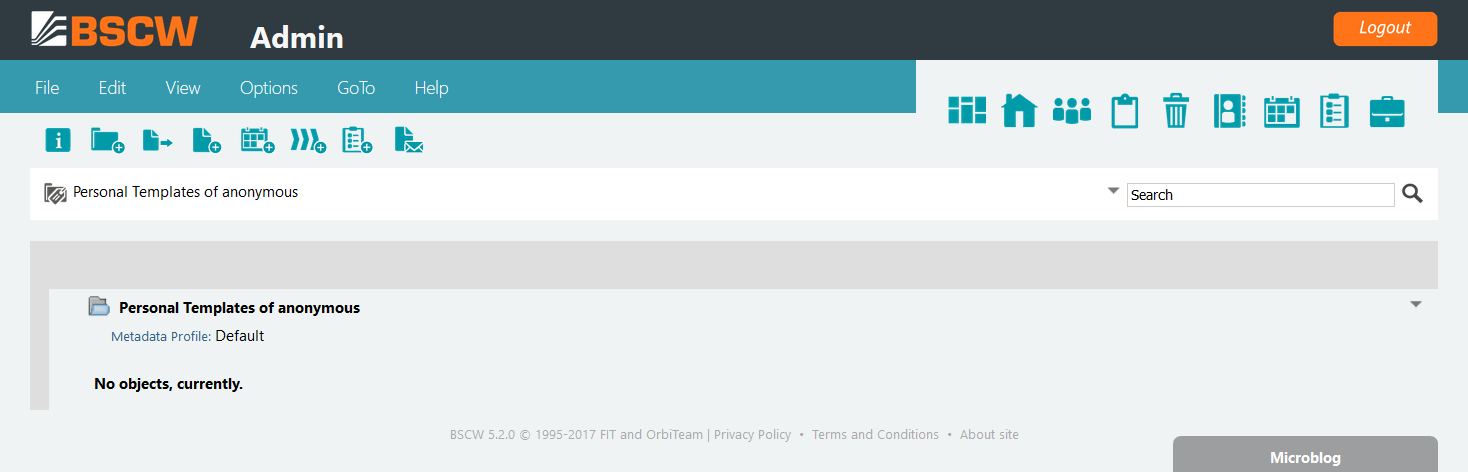
Open the form and assign the manager role to your account by the selection of
[x]
Manager
. Afterwards click .Create a new template folder with . Enter a name and click .
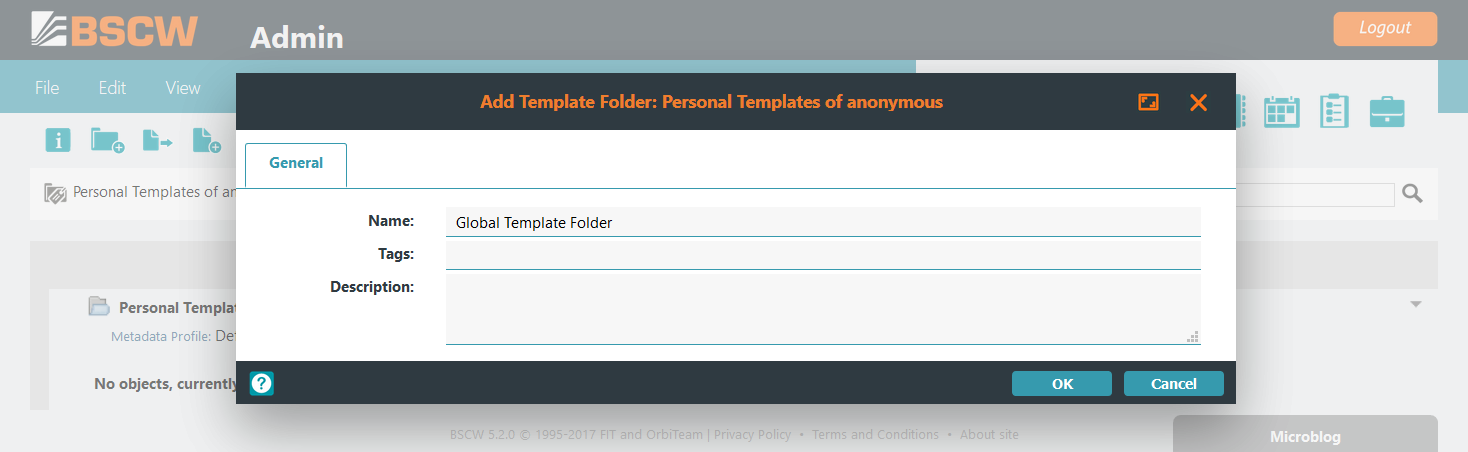
Open the form again and click and afterwards
Place whatever BSCW objects you want into the template folder to appear as templates for all (registered) users.
7.11. Web Service API
BSCW offers a range of services via different web service protocols: XML-RPC, JSON, SOAP
Basically most of the actions available on the user interface (like “add folder”) are accessible via a web service API. Of course access to API is restricted via access control as in the regular user interface (i.e. authentication and BSCW internal roles and rights are respected).
In order to use the web service API it must be enabled by setting the
ACCEPT_WEBSERVICES variable to 1
(default) in the BSCW instance configuration file
<bscw-runtime-path>/conf/config.py. If ACCEPT_WEBSERVICES set to 0, web service protocol requests will
be rejected by BSCW with the HTTP error code 501:
content_unsupported.
Please note that BSCW is distributed with API documentation in HTML format and some API examples as Python scripts:
the API documentation in HTML format is located in
<bscw-path>/lib/bscw-5.2.7-<rev>-py27/doc/devel/BSCW|relmaj|-API.zip
the API examples as Python scripts are located in
<bscw-path>/lib/bscw-5.2.7-<rev>-py27/etc/src-aux/remote_client
7.12. Some useful hints
There exist a number of naming conventions for user objects which may be useful to know for system administrators. These conventions can be used to address the respective objects directly by entering a corresponding URL into the address field of the browser. The URL patterns for these URLs are:
https://bscw.domain.org/sec/bscw.cgi/<shortname><username>
or:
https://bscw.domain.org/sec/bscw.cgi/<shortname><emailaddress>
where <shortname> is a single character of the following list:
<shortname> ::= {
    @ #addrBook |
    _ #waste |
    ` #case |
    $ #lockbag |
    & #bag |
    + #calendar |
    * #bookmarks |
    r #resources |
    : #home |
    = #portal |
    ~ #tasklist |
    u #user |
    m #email address
}
and <username> is the name of a registered user and
<emailaddress> is an email address for which a registration process
has been initiated. For example, for a user with BSCW user name
"alice" and the email address "alice@orbiteam.de" the URL .
https://bscw.domain.org/sec/bscw.cgi/malice@orbiteam.dewill return the info page of the email address, in particular status information about the email address (pending, allocated, bounced) and a link to the BSCW user if allocated;https://bscw.domain.org/sec/bscw.cgi/ualicereturns the info page for user alice with additional information available only to system administrators such as icons leading to the user’s home page, bag, waste basket and the list of locks that the user has currently set on documents;
The following short names may be used to immediately access the users’ personal objects:
https://bscw.domain.org/sec/bscw.cgi/@aliceshows the users’ address book;https://bscw.domain.org/sec/bscw.cgi/_aliceshows the users’ waste basket;https://bscw.domain.org/sec/bscw.cgi/`aliceshows the users’ briefcase;https://bscw.domain.org/sec/bscw.cgi/$aliceshows the locks that the user currently holds on documents;https://bscw.domain.org/sec/bscw.cgi/&aliceshows the users’ clipboard;https://bscw.domain.org/sec/bscw.cgi/+aliceshows the users’ calendar;https://bscw.domain.org/sec/bscw.cgi/*aliceshows the users’ bookmarks;https://bscw.domain.org/sec/bscw.cgi/raliceshows the users’ personal template folder;https://bscw.domain.org/sec/bscw.cgi/:aliceshows the users’ home page;https://bscw.domain.org/sec/bscw.cgi/=aliceshows the users’ portal;https://bscw.domain.org/sec/bscw.cgi/~aliceshows the users’ task list.