


Groupware made in Germany
Pioniere der Cloud
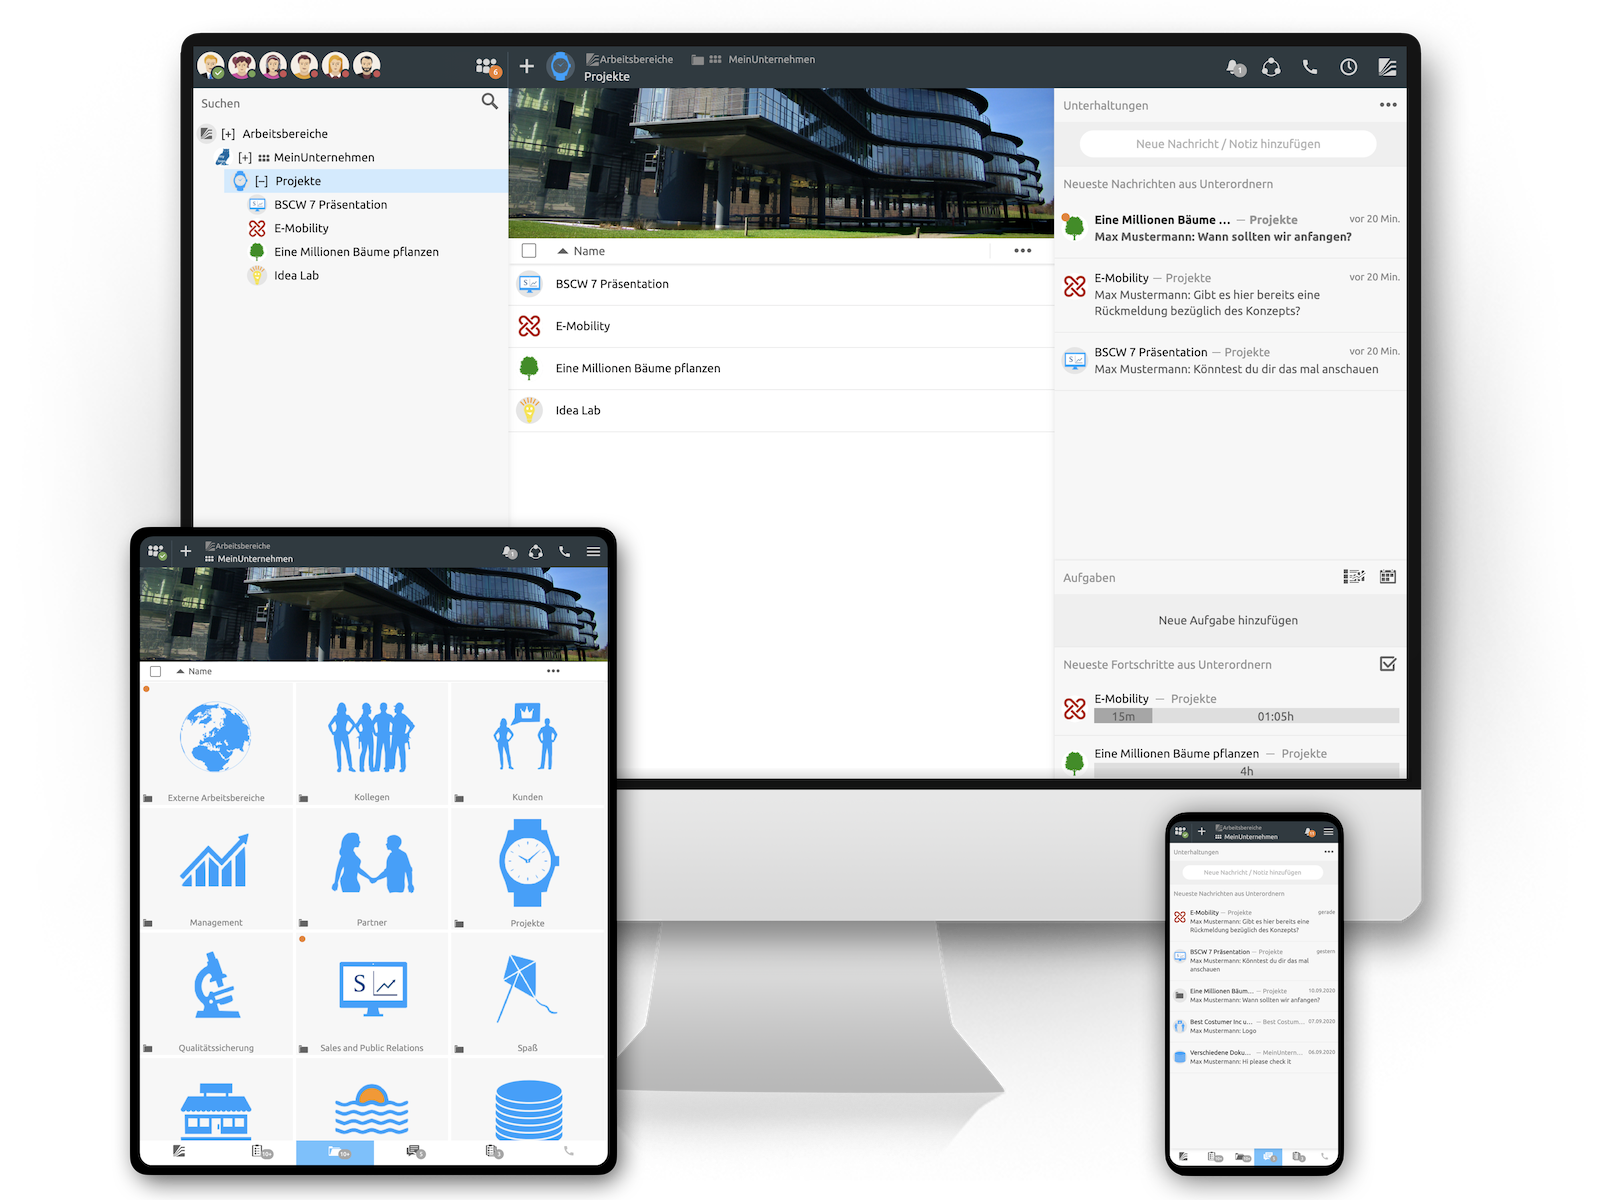
BSCW Social
Aus Gruppen werden Teams.
Setzen Sie neue Potentiale frei!
Aus Gruppen werden Teams.
Setzen Sie neue Potentiale frei!
- x Projektmanagement, Aufgaben und Aufwandsabschätzung
- x Nachrichten im Chat & Audio-Video-Konferenzen
- x Dokumente teilen und gemeinsam bearbeiten
- x Gemeinsame Kalender, Terminfindung
- x inklusive dem Besten des BSCW Classic
BSCW Classic
Maßgeschneidert und etabliert.
500+ Funktionen für alle Ihre Anforderungen.

Maßgeschneidert und etabliert.
500+ Funktionen für alle Ihre Anforderungen.
- # Umfangreiches Rollen- und Rechte-Management
- # Dokumente durchsuchen, komplexe Suchen ausführen
- # Digitale Laufmappen
- # Wikis – Daten in Wissensdatenbanken strukturieren
- # Hohe Sicherheit durch Standort Deutschland